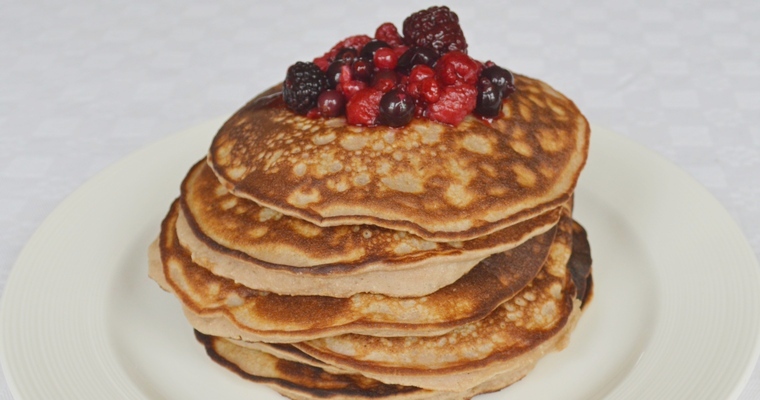
Easy recipe for deliciously light and fluffy thick-style pancakes. These Dairy-free, Gluten-free and ‘drop scones’ use tapioca, chestnut and coconut flours.
Gluten-free pancakes can be difficult to master, as they are prone to falling apart in the pan or having a strong and unpleasant flavour. ‘Drop Scone’ American-style pancakes are better suited to gluten removal than French-style crepes, as the thick, compact structure means that they are less fragile in the pan. Wheat flour is strong, elastic, absorbent and neutral-tasting. The key to successfully replacing wheat flour is to replicate the protein and starch structure by using a combination of gluten-free protein flours and powdered starches. (Read my Guide to Replacing Wheat Flour with Gluten-free Flour for more information.)
Properties of flour:
- strength: egg replicates the sticky properties of gluten, as the proteins contained in the whites coagulate to form a solid mass when heated. Honey is also physically sticky.
- elasticity: tapioca flour is a neutral-tasting starch, which becomes gelatinous when mixed with water. It produces a chewy or spongy texture, but needs to be used in combination with a heavier flour to avoid gumminess.
- hydration: coconut flour is incredibly absorbent. This means that it is good for creating stiffer mixes, by wicking up excess moisture.
- flavour: chestnut flour has a nutty, slightly earthy flavour that falls somewhere in the middle of sweet and savoury. Chestnuts have unusually high carbohydrate content for a nut, which results in a fluffier and lighter texture.
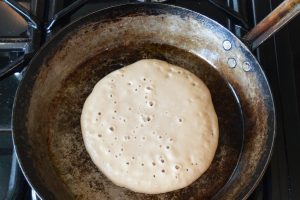
This combination creates beautifully light and fluffy pancakes, when coupled with the correct cooking technique. The key to achieving this texture is to flip the pancakes at the exact point when the egg proteins have set around the little pockets of air produced by the baking soda, but before the bottom has started to overcook and burn. Happily, it is easy enough to recognise this point, as the air bubbles will rise to the top and form large bubbles on the surface. If you find that the underside is browning too much, reduce the heat. If you find that your pancakes are gummy and wet in the middle, increase the heat or cooking time. It may take you a couple of batches until you discover the optimum heat for making pancakes on your stove. All you need to do is watch your little pancakes closely, and adjust the heat to make them happy.
In devising this recipe, I have been mindful of making one that is easy to remember (by using multiples of 2 for the main ingredients), and easy to make first thing in the morning. You can make the batter the night before, minus the baking soda, and store it covered in the fridge. When mixed with acid (in this recipe, honey), baking soda reacts and produces carbon dioxide. It is these bubbles that create a light and fluffy texture in baked goods. As the reaction is immediate, baking soda should only be added to batters just before they are about to be cooked, so that the egg proteins trap the air as they set. Alternatively, you can cook the pancakes in advance and warm them just before serving. To avoid sogginess, the best way to reheat pancakes is by using direct, dry heat, such as a grill or an un-oiled pan on the stove (do not use a pan with non-stick coating). But you can also reheat pancakes in the microwave, or in an oven preheated to 180°C/355°F (cover the tray with tin foil to prevent burning). You can store cooked pancakes out of the fridge in an airtight container overnight, but transfer to the fridge if you are storing them for longer, or live in a hot climate.
Tips & Tricks
- Leave the batter to rest for at least 15 minutes – this softens and hydrates the coarse, gluten-free flours
- Heat the pan to sizzling point – this creates an instant seal when the batter is added, preventing it from sticking to the bottom
Ingredients
for the batter:
- 2 tablespoons (25g) coconut flour
- 2 tablespoons (20g) tapioca flour
- 2 tablespoons (20g) chestnut flour
- 1/8 teaspoon fine sea salt
- 2 medium eggs (60g each), at room temperature
- 2 teaspoons (12g) runny honey
- 90ml (90g) water
- 1/2 teaspoon baking soda
for greasing the pan:
- 1 teaspoon cooking oil (I used lard)
Instructions
- Make the batter. Sieve the flours into a large mixing bowl. Add the salt, and stir until blended.
- Crack the eggs into a separate bowl, and spoon in the honey. Briefly whisk with a hand whisk until fully blended to a uniform primrose colour. Add the water and whisk until blended.
- Make a well in the flour and pour in the liquid ingredients. Thoroughly whisk until all the dry ingredients are incorporated, and the batter is smooth and uniform. The batter should have the consistency of thick custard. Set aside and leave to rest for at least 15 minutes (you can make the batter the night before and leave in the fridge if you prefer).
- Cook the pancakes. Just before cooking, add the baking soda to the batter and give the whole lot a thorough whisk. Pour one-third of the batter into a mug (about 90ml / 90g).
- Heat a frying pan that measures at least 20cm/9″ across the base over a high heat, then add the cooking oil. Once the oil is hot, turn the heat down to medium. A few drops of water should sizzle and evaporate upon contact with the pan. You need only enough oil to thinly coat the bottom of the pan, so tip out the excess into a mug.
- Hold the mug of batter over the centre of the pan, and pour over in one go. Do not tilt the pan to spread the batter evenly across the whole pan, as this will make the pancake too thin and fragile. Instead, leave the pancake to cook undisturbed, until the surface is dotted with large bubbles, and has changed to a gel-like state rather than a liquid – about 90 seconds to 2 minutes. Slid a fish slice under the pancake, then lift and flip in one decisive movement. Cook the second side for two-thirds of the time – about 1 minute. Adjust the heat if the cooking side is browning too quickly, as the centre needs enough time to set and dry out.
- Transfer the cooked pancake onto a plate. Add a small amount of the reserved cooking oil to the pan (less than 1/4 teaspoon), and swirl evenly across the bottom. Pour in another mug of batter, and repeat the process until all the batter is used up.
- If you are cooking a big stack of pancakes, warm before serving by putting each pancake back into the pan for 10 seconds a side. There is no need to add cooking oil, as the pancakes will not stick. Serve topped with berries, chopped bananas and a drizzle of maple syrup.


