Everything you need to know to cook authentic Indian curries. Explains how to toast and fry spices to release flavour, and the sequence for cooking a curry.
Technique
01. What is a curry?
02. What are spices?
03. What do spices taste like?
04. What is the difference between whole and ground spices?
05. How do I grind whole spices?
06. Do I need to toast whole spices before grinding them?
07. How do I cook spices to release the flavour?
08. How long do I cook spices to release the flavour?
09. How do I stop spices from overcooking?
10. Why are you told to cook curry until the oil separates?
11. Why does my curry look greasy, and how do I fix it?
12. What is the sequence for cooking a curry from scratch?
13. What is the sequence for cooking a curry using a curry paste?
14. Why make curry pastes?
15. How do I store home-made curry pastes?
16. Can I prolong the shelf-life of a home-made curry paste?
17. How do I store curries (and why do they taste better the next day)?
Recipes
18. Curry Paste Recipes
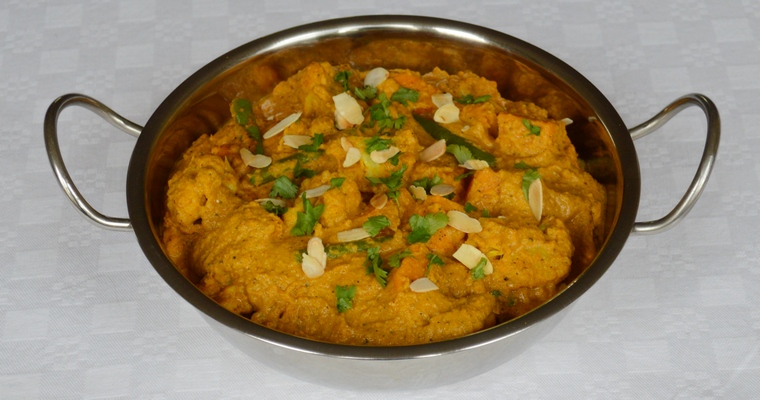
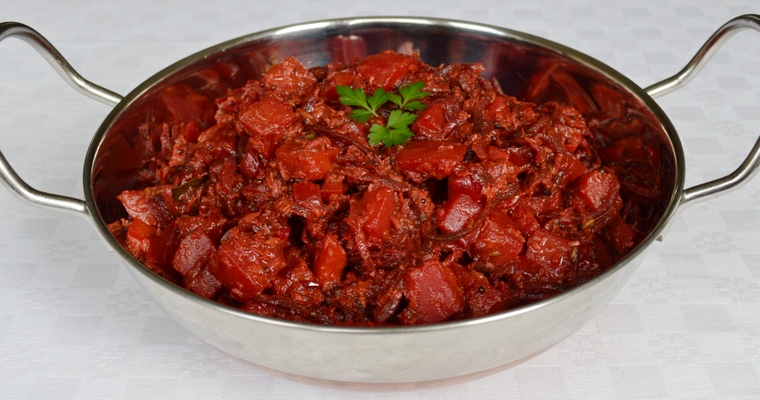
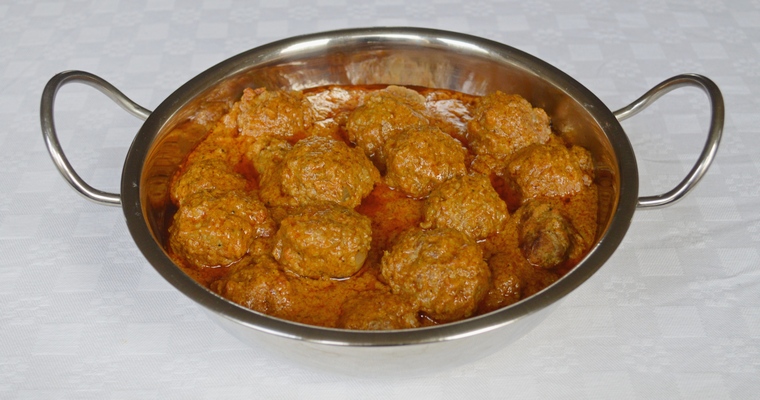
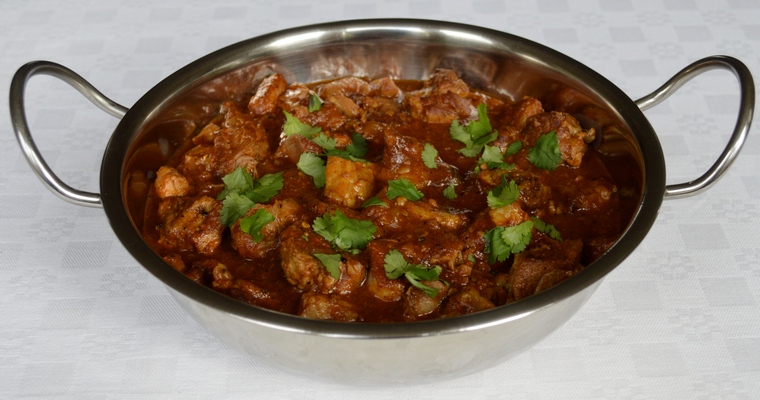
19. Curry Recipes
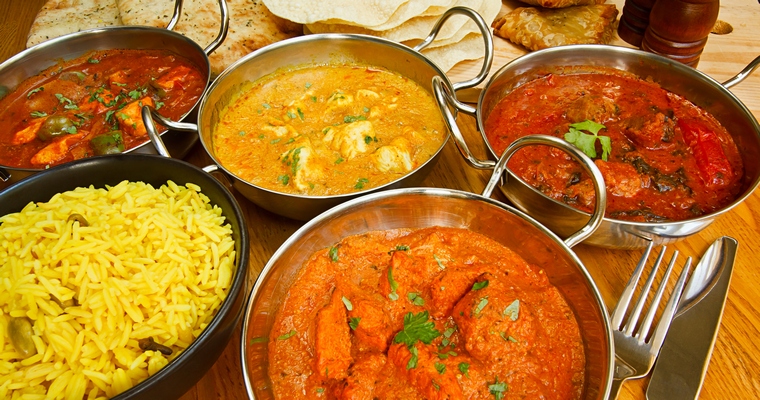
01. What is a curry?
Curries are liquid or semi-liquid dishes in which chopped vegetables, animal protein or pulses are braised in a smooth sauce that has been flavoured with spices and aromatics, and thickened without the use of flour. The cooking technique is broadly the same as that used to make stews like Beef Bourguignon, Chili con carne, Feijoada, or Ratatouille. Curries have a soft and uniform texture, which means that the interest and complexity comes from the skilful blending of spices to create colour, aroma, warmth and flavour.
02. What are spices?
Spices are dried plant matter, derived from the seeds, fruit, bark or root of plants. The leaves and flowers are classified as herbs, being less pungent and less robust. Because spices are taken from a hard and fibrous part of the plant, they are difficult for the body to break down and digest. This is the plant’s natural defence mechanism – it does not want to encourage animals to chew off protective layers of bark, or destroy the life potential of seeds during transit through the digestive tract. Many plants actual rely on animals dispersing undigested seeds through their excrement. Unlike herbs, spices must be cooked to improve digestibility, and also to mellow the flavours.
03. What do spices taste like?
Spices are used to give food flavour rather than heat. Although ‘spicy’ is used interchangeably with ‘hot’, most spices do not produce a piquant stinging sensation in the mouth. Many Indian curries impart a mild and aromatic warmth, rather than tongue-searing heat. Chilli peppers originated from South America, and were only introduced to India by Portuguese traders in the early 16th century. It is telling that the Indian curry with the fieriest reputation – the vindaloo – is derived from a Portuguese dish (carne de vinha d’alhos). Before the arrival of chillies, peppercorns were used to give food piquancy. Dried chillies are better at infusing flavour into sauce than fresh chillies. Fresh chillies give a brighter flavour that is less intense and long-lasting, but can overpower other flavours. Smaller chillies are more piquant than larger chillies, while chopped chillies are more piquant than slit chillies, which are more piquant than whole chillies.
- fennel seeds
- liquorice root
- star anise
- bay leaves
- fenugreek seeds
- mustard seeds
- nigella seeds
- turmeric
- asafoetida
- black cardamom
- coriander seeds
- cumin seeds
- turmeric
- cayenne pepper
- chilli powder
- ginger
- horseradish
- mustard seeds
- paprika
- peppercorns
- black cardamom
- cayenne pepper
- cumin seeds
- curry leaves
- smoked paprika
- allspice
- cinnamon
- cloves
- green cardamom
- nutmeg
- saffron
04. What is the difference between whole and ground spices?
Spices may be used as they are (whole), or milled into a powder form (ground). For example, green cardamom pods may be added directly to the dish, or they may be cracked open and the seeds scraped out and ground. Whole spices need to be fished out and discarded before serving, as they are not digestible. When used in whole form, spices take longer to release flavour, and the flavour that they do produce is subtler. This means that whole spices tend to be added at the beginning of cooking, and are used to gently infuse oil and cooking liquids. Ground spices are blended into sauces, resulting in a more concentrated flavour, a smoother texture, and an addition of colour. For example, if whole green cardamom pods are added to custard sauce, then they produce an aromatic hint of cardamom. If ground cardamom seeds are used, then cardamom becomes the dominant flavour note, and the sauce takes on a speckled appearance.
05. How do I grind whole spices?
An electric coffee grinder is a quick and easy way of grinding whole spices into a fine powder. This does not work so well with small amounts, as the rotary blades fling the spices up to the top and away from the blades. You can mitigate this by holding the spice grinder at a slight angle as it whirls, or you can use a pestle and mortar to bash and grind small amounts. Ground spices go stale quicker because a larger surface area is exposed to air. This means that it is always better to buy whole spices, and grind them just before you intend to use them. Unopened spices that are sold in airtight packaging will remain potent for 2-3 years, as the sealed packaging will stop air from getting in. Once opened, whole spices should be used within 1 year, and ground spices within 6 months. Some spices such as paprika are only sold in ground form, while other spices such as turmeric can be difficult to find in whole form.
06. Do I need to toast whole spices before grinding them?
Most whole spices benefit from being lightly toasted before they are ground. This develops the flavour, and makes them easier to grind by driving out excess moisture. The process involves heating a heavy-based pan (preferably cast-iron) over a medium heat, and briefly dry-frying the spices until they emit a fragrant aroma, tossing or stirring the spices to avoid scorching. It is important to stop before they brown, as over-cooking destroys the flavour. The aroma signals that it is time to stop, as the volatile essential oils have been released. This takes anywhere from 30 seconds to 5 minutes. Different spices brown at different rates, so spices should be toasted individually, rather than simultaneously. Ground spices are not toasted, as the small particle size means that they would burn and develop bitter flavours.
07. How do I cook spices to release the flavour?
Spices need to be fried in hot oil to release their flavour compounds and cook out the raw flavour. Heat releases the volatile essential oils, which dissolve into the cooking oil. The oils are described as ‘essential’ because they contain the essence of the plant’s fragrance, and ‘volatile’ because they evaporate and get lost. This means that the flavours mellow and take on a new complexity. But even while some flavour compounds are destroyed, new ones are being created. This process is called ‘blooming’. As essential oils are not soluble in water, it is important not to introduce too much moisture to the pan at this stage. This is why fresh aromatics like onion, garlic and root ginger are generally added before spices, and fried until their juices have been released and evaporated. Sometimes ground spices are not fried in oil at all, and are simply sprinkled over the dish toward the end of cooking. When this is done, it is done to extract aroma, rather than flavour. Aromatic spices include green cardamom, cinnamon, garam masala and nutmeg.
08. How long do I cook spices to release the flavour?
If spices are fried in oil for too long, they burn and develop a bitter flavour. Different spices bloom at different rates – some spices take no more than 30 seconds to release their flavour, while other spices need several minutes. This means that the spices in a curry recipe cannot be added to the pan simultaneously. Instead, they need to be added in a particular sequence, so that slow-cooking spices go in first, and fast-cooking spices go in last. Whole spices take longer to release their flavours, as ground spices have a larger surface area. When a spice has released its essential oils it will emit a fragrant aroma. But you may also notice a change in colour, and some whole spices like cumin seeds and mustard seeds will crack and pop.
- asafoetida powder
- chilli powder
- cumin seeds
- fennel seeds
- fenugreek seeds
- mustard seeds
- turmeric powder
- chilli flakes
- nigella seeds
- peppercorns
- cloves
- coriander powder
- bay leaves
- cardamom pods
- curry leaves
- cinnamon quill
- star anise
- whole dried chillies
09. How do I stop spices from overcooking?
Once spices have released their flavours into the cooking oil, it is important to bring down the temperature of the pan quickly to avoid burning. This is usually done by adding a cooking liquid like water, coconut milk, stock, or chopped tomatoes. But the temperature can also be reduced by adding diced meat or vegetables, as these go into the pan cold and release moisture. When making a curry, it is good practice to prepare all the ingredients before you start cooking, so that they can be kept to hand and added quickly. It can also be useful to keep a small jug of water nearby, which can be used as an emergency coolant if the spices are in danger of burning.
10. Why are you told to cook curry until the oil separates?
Once the aromatics and spices have been fried to develop the flavour of the curry, the cooking liquid and main ingredients can be added to create the body, texture and acidity of the curry. The curry is then kept at a simmer and cooked, uncovered, until the oil separates out. When this happens, the sauce takes on a curdled appearance as the oil oozes out to the sides and forms a greasy layer on top. This indicates that all the water in the sauce has evaporated, allowing the temperature to exceed 100°C/210°F. This breaks down the heat-sensitive emulsion that kept the oil dispersed in the cooking liquid. It is important to cook the curry to this stage, because higher temperatures are needed to develop the flavour, and stop the spices from tasting raw. Driving off the excess water also concentrates the flavour and reduces the sauce. A thick sauce will cling to meat and vegetables, rather than running off and pooling at the bottom of the plate.
11. Why does my curry look greasy, and how do I fix it?
Unlike European stews, excess cooking oil is not generally skimmed off curries before serving. This is because it contains a lot of the flavour from the essential oils, which were dissolved into the cooking oil during the blooming stage. As oil is essential for carrying flavour in a curry, it is important not to skimp on it. Also, if too little oil is used, then the spices will stick to the bottom of the pan and burn during the blooming stage. In this scenario, only constant stirring will prevent the spice mix from burning. This is why restaurant curries tend to be very greasy, as excess oil allows staff to leave pans unattended. If you accidentally add too much oil, then you can skim it off the top of the curry.
12. What is the sequence for cooking a curry from scratch?
Although Indian cuisine enjoys fantastic regional diversity, the cooking method is remarkably similar for most curries. The variety and complexity comes not only from the proportion of spices used, but also from the order in which they are added to the dish. The same spice can be fried in oil at the beginning to deliver full potency to one dish, but added to a simmering dish towards the end to provide only an aromatic hint of flavour. For example, Tarka Dal is a mild lentil dish with a creamy texture. Although it contains dried chillies and other spices, these are cooked separately, and stirred through at the end like a garnish. But if the fried chillies were simmered with the lentils, the whole dish would be hot and flavoured with the spices.
1. Aromatics
- onions
- fresh chillies
- garlic
- root ginger
2. Spices
- whole spices (allspice, bay leaves, cardamom pods, cinnamon quill, cloves, coriander seeds, cumin seeds, curry leaves, fennel seeds, fenugreek, mustard seeds, nigella seeds, peppercorns, star anise)
- ground spices (asafoetida, chilli powder, ginger, nutmeg, paprika, turmeric)
3. Liquid
- coconut milk
- chopped tomatoes
- cream
- coconut milk
- stock
- yoghurt
- water
4. Thickener
- ground nuts (almonds, cashews, peanuts)
- ground seeds (mustard, poppy, pumpkin)
- lentils
- pureed vegetables (spinach, onion, peppers, tomatoes)
5. Protein / Carbohydrate
Once the main ingredient has been added, the sauce is kept at a gentle simmer, until the oil separates out. If the meat and vegetables are not tender enough at this stage, then more liquid should be added to facilitate cooking, and prevent the spices from burning.
- chicken (diced or on the bone)
- eggs (boiled and slit)
- fish (diced, filleted or whole)
- meat (ground, diced or on the bone)
- pulses (pre-soaked)
- vegetables
6. Souring Agent
- chopped fruit (mangoes, tomatoes)
- citric acid (lemon juice, lime juice)
- tamarind (soaked and strained, or concentrate from a jar)
- vinegar (coconut palm vinegar, cider vinegar, rice vinegar, wine vinegar)
- yoghurt
7. Garnish
- fresh chopped herbs (coriander, mint)
- sliced aromatics (chillies, ginger, spring onion, crispy browned shallots)
- fried whole spices (cumin seeds, mustard seeds, nigella seeds)
- toasted nuts (flaked almonds, desiccated coconut, pistachio)
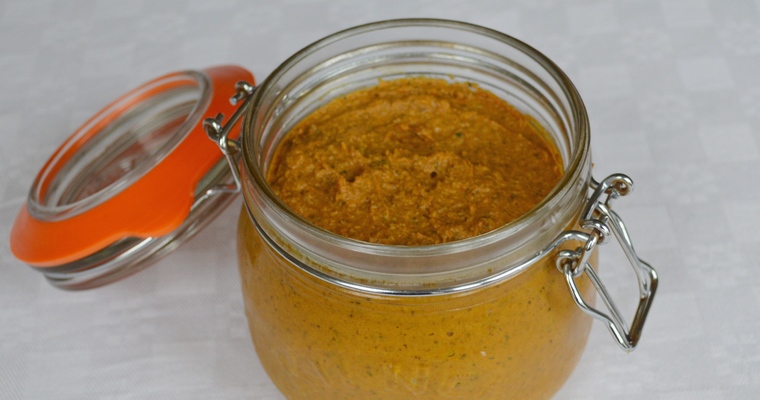
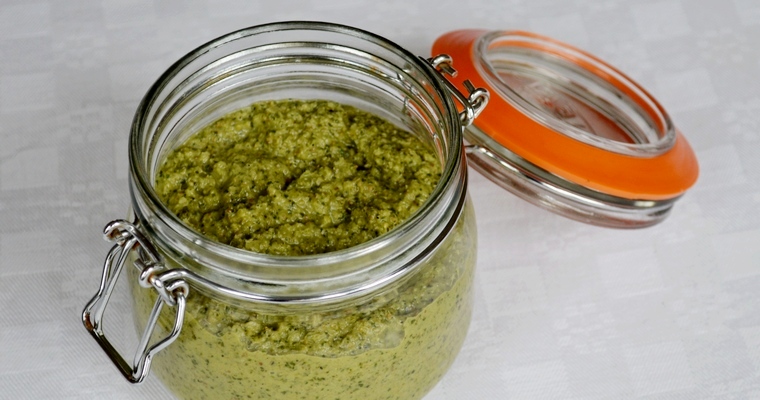
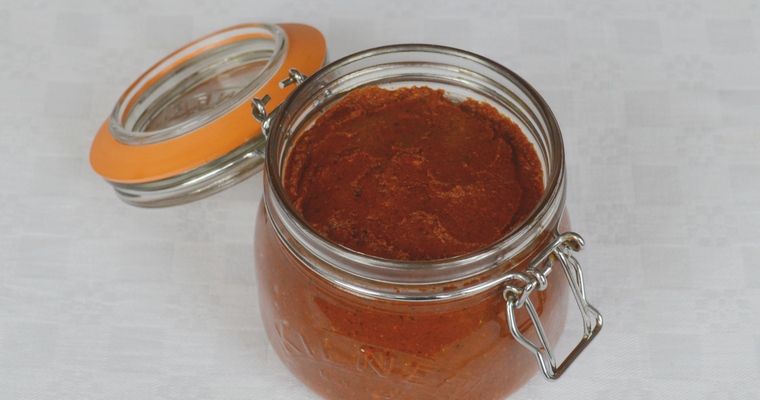
13. What is the sequence for cooking a curry using a curry paste?
A curry paste is a wet spice mix made by blending ground spices with fresh ingredients like aromatics and herbs into a thick puree. Ground nuts and seeds may also be added, and the mixture may be loosened by adding liquid. Because the spices are added raw, the paste needs to be fried in hot oil when it is used. The moisture stops the spices from burning until all the water has evaporated out and the oil separates. Once this happens, the liquid base and the main ingredients can be added, just like cooking a curry from scratch.
- whole spices (allspice, bay leaves, cardamom pods, cinnamon quill, cloves, coriander seeds, cumin seeds, curry leaves, fennel seeds, fenugreek, mustard seeds, nigella seeds, peppercorns, star anise)
- ground spices (asafoetida, chilli powder, ginger, nutmeg, paprika, turmeric)
- Aromatics (chilli, onion, garlic, ginger, pepper, tomato)
- Herbs (coriander, mint, parsley)
- Nuts (almond, cashew, peanut)
- Seeds (poppy, mustard, pumpkin, sesame)
- Oil (peanut, vegetable)
- Acid (chopped tomatoes, lemon juice, tamarind, vinegar)
14. Why make curry pastes?
If the process of making a curry with a wet spice blend is broadly the same as making a curry with a dry spice mixture, you may ask yourself why pastes are worth making. Making a curry from scratch can be time consuming. Most of the hands-on time comes from the preparation of the aromatics and spices, which need to be measured out in exact quantities, and then ground or minced. Happily, it is a kitchen task that benefits from economies of scale – that is, it is actually easier to puree a whole head of garlic in the small bowl of a food processor, than it is to mince a couple of cloves on a chopping board with the back of a knife. For the same amount of work, you can make several extra portions of curry paste at the same time, and keep them in the fridge for a quick and easy meal.
15. How do I store home-made curry pastes?
A curry paste should be stored in a sterilised glass jar in the fridge. You can sterilise jars by putting them through the dishwasher on a rinse cycle without detergent, or by boiling in a large pan of water for 10 minutes, and then removing and leaving to air dry. Once the paste has been transferred to a jar, use the back of a spoon to press the mixture down and eliminate air bubbles. Pour a layer of neutral-tasting oil like light olive oil on top to create an airtight seal. This should be poured off before using. In the meantime, it stops airborne bacteria from getting in, and protects the surface from oxidising. Most sealed curry pastes will keep in the fridge for at least 3 months, although the flavour and colour will naturally degrade over time. For full potency, curry pastes are best eaten within 1-2 months. Curry pastes are not suited to freezing, as strong flavours intensify and change during frozen storage. You can home-can curry pastes using the water bath method, but only if they have high-acid ingredients like pureed tomatoes. Otherwise, you need to use a pressure canner to process the paste at a high enough temperature to kill botulism spores.
16. Can I prolong the shelf-life of a home-made curry paste?
If you are making curry pastes for longer storage (more than 1-2 months), then you can add some natural preservatives to stop the fresh aromatics from going mouldy. Bacteria are living things, and rely on the presence of oxygen and water for growth. Do not feed bacteria by adding water to the curry paste – if the paste needs thinning, use a neutral-tasting oil instead. Bacteria cannot grow in acidic environments. Adding acidic liquids like vinegar, lemon juice or tomato puree means that the curry paste will keep for longer. This will change the flavour of the curry, and you may need to add some sugar to temper the acidity. Taste and adjust the seasoning a few minutes before serving, when the flavours have fully developed. If you don’t want to tinker with the recipe, then you can try to kill as much of the micro-organisms that naturally exist in food as possible before bottling. Gently fry the paste for a few minutes until it starts to steam.
17. How do I store curries (and why do they taste better the next day)?
Traditionally, liquid and semi-liquid dishes like soups and stews are made the day before they are to be eaten. This improves the flavour by allowing the spices to develop and meld together. Curry should be stored in the fridge, in an airtight container that prevents flavour transference. The curry should be cooled first, but transferred to the fridge within 2 hours. After 2 hours, the temperature will fall into the optimum range for bacteria to multiply – between 5°C-60°C / 40°F-140°F. If it is not possible to wait for the curry to cool, then run a sink of cold water and sit the container in the sink to bring down the temperature quickly. Curry will keep for about five days in the fridge. For longer storage, freezing would normally be recommended. Braised dishes are particularly suitable for freezing, as the braising liquid creates an airtight seal around the ingredients, protecting them from freezer burn. However, curries and heavily spiced dishes should not be kept in the freezer for long, as the flavours change and become more potent over time.

I am wondering if you can help me. I am a big believer in trying to make my own spice mixes, predominately Garam Masala’s but they always seem to taste the same. So recently I made a spice mix without Coriander seeds. , as most contain them. I added Cinnamon stick, Black Cardamon, Black Cumin, Mace, Fenugreek Seeds and Black Mustard seeds. On tasting it in a pan with onions and tomatoes it was really bitter even though it smelled really sweet. What am I doing wrong??
Are you frying the spices before adding the onions and tomatoes? If so, you could be frying them for too long (burnt things taste bitter).
I dont think I roasted them too long?