Guide to choosing the right cake tin. Lists the volumes of round and square tins, and conversion table for adapting recipes to use a different size or shape
Technique
01. Why is the size of the cake tin important?
02. How do I choose the right cake tin size?
03. Which cakes are suitable for square cake tins?
04. How do I swap a round cake tin for a square cake tin?
05. How do I adapt a recipe to use a different cake tin?
06. What is the capacity of a standard cake tin?
07. How do I calculate the volume of a round cake tin?
08. How do I calculate the volume of a square cake tin?
09. How do I line cake tins?
10. What is the best material for cake tins?
11. Which are the most useful cake tins to buy?
12. Which cake tins are best for gluten-free baking?
Recipes
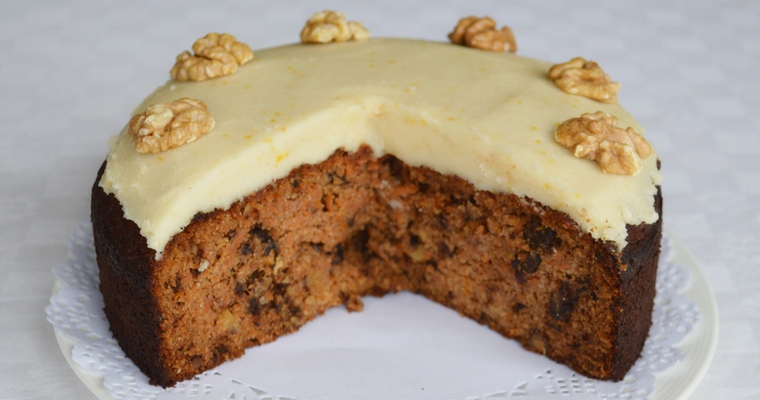
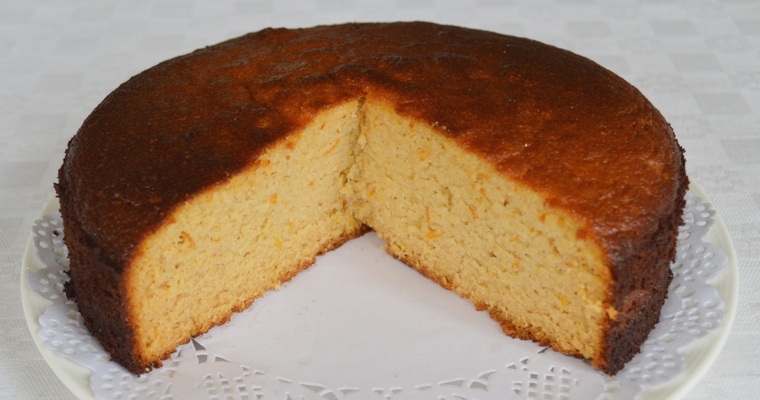
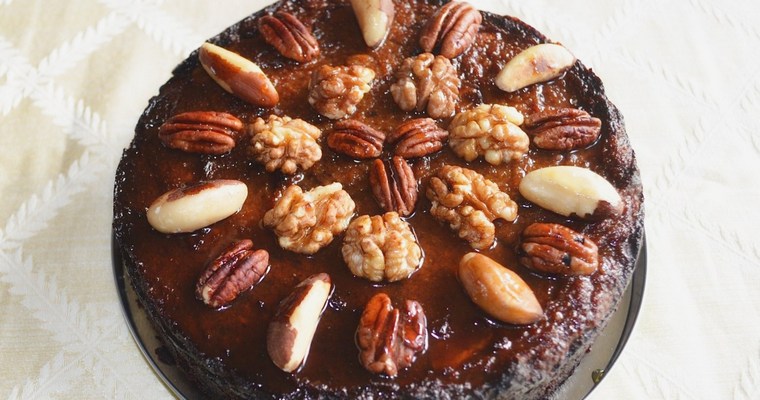
13. Recipes that use 8″ round cake tins
14. Recipes that use 9″ round cake tins
15. Recipes that use square cake tins
01. Why is the size of the cake tin important?
Cake batter expands as it cooks, rising up the sides of the cake tin. This is because raising agents like baking soda and yeast undergo a chemical reaction that produces gas bubbles. This lightens and lifts the mixture by creating a network of tiny air bubbles in the batter. The perfect cake should have a more-or-less level top. This indicates that a steady and sustainable rise happened during cooking. Why is this important? Cakes that have a level top are easier to ice, can be stacked into layers, and are more attractive. But not all cakes turn out perfectly. Most of us, at some point, will have turned out a cake that has a domed top or sunken middle.
The size of the cake tin is an important factor in controlling the rate of rise. The right cake tin distributes heat evenly through the batter as it cooks. Ovens cook from the outside in, and so the goal is always to make sure that the edges do not overcook and scorch before the middle has finished cooking and set. (This is why the standard test for doneness is to insert a toothpick into the centre and see if it comes away clean.) If the cake tin is too small, then the batter will be spread too thickly and cook too slowly. The cake may struggle to rise under its own weight, resulting in a cake that is dense and undercooked in the middle. If the cake is removed from the oven too early, then the middle will collapse as it cools and the heavier batter sinks to the bottom. If the cake is left to cook in a hot oven, then the raw batter will be forced into the centre, resulting in a domed top with a cracked surface. But if the cake tin is too large, then the batter will be spread too thinly and cook too quickly. The batter will cook and set before the chemical raising agents have been spent and produced enough air bubbles. This will result in a cake that is crisp and flat.
02. How do I choose the right cake tin size?
The standard advice is to fill cake tins between half to two-thirds full with raw batter. Half-filled is best for light and fluffy cakes like Victoria sponge, as these will rise a lot in the oven. Two-thirds is best for denser cakes like banana cake, as these will not rise so much. Denser cakes are generally those that do not use the creaming method to blend granulated sugar into butter. For example, the methodology for making Jamaican ginger cake involves melting the sugar and butter in a pan. Most gluten-free cakes are naturally dense, and so cake tins should be filled two-thirds full if you are baking without wheat flour.
Making a cake is a time-consuming process. It involves clearing at least a 2-hour window in which to prepare, measure, mix, cook and wash up. If, at the final hurdle of pouring the batter into the cake tin, you discover that the cake tin is under- or over-filled, it’s tempting to just bung it in the oven and hope for the best. Resist this impulse. Your cake will not turn out well, and all your efforts will have been for naught. Instead, scrape out the mixture into a more appropriately-sized cake tin. (Work quickly if your batter contains baking soda, as it will begin reacting as soon as it is mixed with an acidic ingredient.) But, if you must persevere with your prepared cake tin, then adjust the cooking time to factor in the depth of the batter. If the cake tin is under-filled, then reduce the cooking time by 20% – 25% (10 – 15 minutes for a typical sponge cake). If the cake tin is over-filled, then increase the cooking time by 20% – 25%, or spoon out the excess into cupcake moulds.
03. Which cakes are suitable for square cake tins?
All around the world the default shape for cakes is round. This is probably for historic reasons. Early cakes were just a form of bread, risen by yeast and enriched with eggs, honey, nuts and dried fruit. The dough was formed into balls and cooked on a flat surface like a griddle or hearthstone. This produced naturally flat, round cakes. Cake hoops only appeared in the seventeenth century, as a precursor to cake pans for moulding cakes into more uniform and presentable shapes.
But there are practical reasons why round cakes remain ubiquitous. Round cake tins distribute heat evenly around the sides, whereas square cake tins are prone to overcooking at the corners. Square cakes are also harder to ice, as the corners need to be sculpted into sharp edges. Square or rectangular cake tins are generally reserved for flat, dense bakes like brownies, flapjack, rocky road, shortbread, cherry bakewells and parkin. These ‘slab’ or ‘sheet’ bakes are cut into individual square portions before being turned out of the cake tin. This makes them a practical choice for large parties. Round cakes can only be sliced into wedges, which creates a fragile ‘nose’ that is prone to crumbling. Round cakes can only be sliced at the point of serving, as the lighter, drier crumb will go stale when exposed to air.
04. How do I swap a round cake tin for a square cake tin?
You should think carefully before using a different tin shape to the one specified in a recipe. Cakes that are cooked in round cake tins are usually intended to be light and fluffy, rather than dense and squidgy. Light and fluffy cakes like sponges contain equal amounts of sugar, fat, flour and eggs. This produces a dry crumb. Dense and squidgy cakes have a higher ratio of sugar, fat and liquid ingredients. This produces a moist crumb. If you cook a drier cake in a square cake tin, then it is danger of dying out at the corners by the time the centre is cooked. You can try to mitigate this by making the following adjustments:
- use a light-coloured cake tin – these absorb less heat
- line the cake tin with a double layer of baking paper – this insulates the cake
- wrap the outside of the cake tin in baking strips (or a triple layer of brown paper) – this insulates the cake
- tent the top with tin foil – this avoids over-browning
- position on a shelf in the lower half of the oven – this is where the heat is gentler
- place a tray on the oven shelf above – this deflects the heat
- place a tray of water on the oven shelf below – this creates steam and distributes the temperature more evenly
Due to the absence of corners, round cake tins hold around 25% less than square cake tins. In practical terms, this means that you need to go down one size when swapping a round cake tin for a square cake tin. That is, an 8″ round cake tin has the same capacity as a 7″ square cake tin. Conversely, you need to go up one size when swapping a square cake tin for a round cake tin. That is, an 8″ square cake tin has the same capacity as a 9″ round cake tin.
05. How do I adapt a recipe to use a different cake tin?
The primary consideration when adapting a recipe to use a different cake tin is to ensure that the depth of batter remains the same. Regardless of the size of the cake tin, the batter should always come halfway up the sides (or two-thirds for denser cakes). This means that you will need to adjust the amount of batter that is produced, by scaling the ingredients up or down. In order to calculate the factor of multiplication, you need to work out the difference in volume between the original cake tin and the replacement cake tin. To do this, simply divide the volume of the replacement cake tin by the volume of the original cake tin. For example, if the replacement cake tin holds 1 litre, and the original cake tin holds 2 litres, then 1 / 2 = 0.50. To adapt the recipe, you need to multiply the ingredients by a factor of 0.50 (so 100g x 0.5 = 50g). Following the same logic, if the replacement cake tin holds 3 litres, and the original cake tin holds 2 litres, then you need to multiply the ingredients by a factor of 1.5 (so 100g = 150g).
As a general rule of thumb, you need to increase / decrease ingredients by 25% each time you go up or down a cake tin size. This may pose a problem with eggs if the recalculated number does not equal a whole number. For example, if the original recipe specifies 6 eggs, and the recipe is adapted to use a 7” cake tin instead of an 8” cake tin, then the number of eggs will need to be decreased by 25% to 4.5 eggs. Ratios are important in baking recipes. For example, a pound cake contains equal weights of egg, flour, fat and sugar. If you increase the amount of egg, without making proportionate adjustments to the other ingredients, then this will alter the texture and flavour. When faced with the prospect of trying to remove half an egg from a mixing bowl (particularly tricky if the recipe calls for the egg whites to be separated from the yolks), the easiest thing to do is calculate the total weight of egg required, and then see if you can make up this amount in whole eggs by switching to a difference egg size. For example, a medium-sized egg weighs around 55g in its shell, while a large egg weighs around 65g. 55g x 4.5 = 248g, which is close enough to the weight of 4 large eggs, as 65g x 4 = 260g. (Unless otherwise stated, recipes use medium-sized eggs.)
| Number of Eggs | Small (~45g) |
Medium (~55g) |
Large (~65g) |
Extra Large (~75g) |
|---|---|---|---|---|
| 1 egg | 45g | 55g | 65g | 75g |
| 2 eggs | 90g | 110g | 130g | 150g |
| 3 eggs | 135g | 165g | 195g | 225g |
| 4 eggs | 180g | 220g | 260g | 300g |
| 5 eggs | 225g | 275g | 325g | 375g |
| 6 eggs | 270g | 330g | 390g | 450g |
You will also need to adjust the cooking time if you are changing the cake tin size. If you go up a cake tin size, then it will take longer for the cake to cook all the way to the centre. This means that you will probably need to increase the cooking time by 20% – 25% (10 – 15 minutes for a typical sponge cake). If you go down a cake tin size, then it will take less time for the cake to cook all the way to the centre. This means that you will probably need to reduce the cooking time by 20% – 25%. I prefix these recommendations with “probably”, because the rate at which cake cooks depends on many variables, such as the type of recipe and the weight and colour of the cake tin. Cooking times should only ever be treated as a guide, and should not be slavishly adhered to at the expense of producing an under- or overcooked cake. A fluffy sponge cake is done when the top has a golden crust and feels springy to the touch. A moist cake is done when the sides start to pull away from the cake tin.
06. What is the capacity of a standard cake tin?
In a perfect world, cake tins would be standardised. It would be possible to definitively state that any round cake tin measuring 9 inches wide and 2 inches high must have a volume of 2.08 litres. Unfortunately, there is no International Bureau of Cake to agree and enforce standards of measurement. The internal dimensions of a ‘standard’ cake tin can vary quite significantly between brands. This is to do with companies trying to maximise profit by skimping on materials. Cake tins are measured from inside edge to inside edge. The thickness of the bottom and sides should not be included. This means that the external dimensions of a cake tin should be slightly larger than the stated cake tin size. But many manufacturers save money by taking the external dimensions rather than the internal dimensions – that is, the thickness of the cake tin is included in the measurement. Standardisation is particularly problematic with square and rectangular cake tins. These may have rounded or sharp corners, and straight or sloping sides.
The only foolproof way to know the precise volume of a cake tin is to fill it to the brim with water and measure how much water it holds. You can do this using a measuring jug, or by placing on measuring scales and weighing the amount of water added (100g = 100ml). This method does not work for cake tins that have removable bottoms, as the water will leak out before you have a chance to take an accurate measurement. For loose-bottomed cake tins, you could try first lining with a waterproof material like a large freezer bag. Or you can use a mathematical formula to calculate the volume, based on the dimensions of the cake tin. The volumes given in the table below are based on a mathematical calculation, and are therefore theoretical and approximate. In all cases, the volume has been slightly underestimated by subtracting a 1/4 inch from the height, and by rounding down decimal points. This is to make allowances for variation in the thickness of the sides, in order to prevent overfilling.
Please note that the table shows how much the cake tin can hold when filled to brim. You should never fill a cake tin to the brim with batter. Batter should only come halfway up the sides of the cake tin (or two-thirds for denser cakes). For example, if the batter for a fluffy Victoria sponge measures 1 litre, then it should be poured into a cake tin with a capacity of 2 litres.
| Maximum Volume (when filled to the brim) |
Round (width x height) |
Square (width x height) |
|---|---|---|
| 0.4 litres | 5 inches x 1.5 inches | |
| 0.5 litres | 5 inches x 2 inches 6 inches x 1.5 inches |
5 inches x 1.5 inches |
| 0.6 litres | ||
| 0.7 litres | 5 inches x 2 inches | |
| 0.8 litres | 5 inches x 3 inches 6 inches x 2 inches 7 inches x 1.5 inches |
6 inches x 1.5 inches |
| 0.9 litres | ||
| 1.1 litres | 7 inches x 2 inches | 5 inches x 3 inches 7 inches x 1.5 inches |
| 1.2 litres | 6 inches x 3 inches | |
| 1.3 litres | 9 inches x 1.5 inches | |
| 1.4 litres | 8 inches x 2 inches | 7 inches x 2 inches 8 inches x 1.5 inches |
| 1.5 litres | ||
| 1.6 litres | 6 inches x 3 inches 10 inches x 1.5 inches |
|
| 1.7 litres | 7 inches x 3 inches | |
| 1.8 litres | 9 inches x 2 inches | 9 inches x 1.5 inches |
| 1.9 litres | 8 inches x 2 inches | |
| 2 litres | ||
| 2.1 – 2.5 litres | 8 inches x 3 inches 10 inches x 2 inches |
7 inches x 3 inches 9 inches x 2 inches 10 inches x 1.5 inches |
| 2.6 – 3 litres | 9 inches x 3 inches | 8 inches x 3 inches 10 inches x 2 inches |
| 3.1 – 4 litres | 10 inches x 3 inches | 9 inches x 3 inches 10 inches x 2 inches |
| 4.1 – 5 litres | 10 inches x 3 inches |
07. How do I calculate the volume of a round cake tin?
The mathematical formula for calculating the volume of a cylinder is as follows:
Radius x Radius x Height x π
This is easier to understand by working through an example. Let’s say we have a round cake tin that measures 9 inches in diameter (the widest point across the circle) and 2 inches high. First, we need to calculate the radius. The radius is the length of a straight line drawn from the centre of a circle to the outside edge. Since we already measured the diameter of the cake tin, we can just halve this figure to get the radius: 9 / 2 = 4.5. We already know the height is 2, and π has a constant numerical value of 3.14. So if we put all the inputs together we get 4.5 x 4.5 x 2 x 3.14 = 127 cubic inches. That is, if you took a big bag of cubes measuring 1 inch by 1 inch each, you would need 127 of them to fill the cake tin to the brim.
Now cubic inches isn’t a very useful measurement when it comes to cake batter. We don’t measure liquid ingredients in inches, we measure them in litres. 1 cubic inch = 0.016387064 cubic litres. So to convert our cubic inches into cubic litres, we simple multiply our answer by this figure: 127 x 0.016387064 = 2.08 litres. However, when I double-checked the results of this calculation by pouring water into my cake tin, I found that it only held 1.9 litres. Clearly a small allowance needs to be made for the thickness of the sides and bottom – after all, it’s better to slightly underestimate the volume, than to overfill and risk leakage! For this reason, the values in the conversion table below have been calculated using the mathematical method outlined above, but with a 1/4 inch subtracted from the height of the cake tin, and decimal points rounded down to the nearest whole number:
(Radius x Radius x (Height-0.25) x π) x 0.016387064
| Width (round tin) |
1.5 inches high |
2 inches high |
3 inches high |
|---|---|---|---|
| 5 inches | 0.4 litres | 0.5 litres | 0.8 litres |
| 6 inches | 0.5 litres | 0.8 litres | 1.2 litres |
| 7 inches | 0.8 litres | 1.1 litre | 1.7 litres |
| 8 inches | 1 litre | 1.4 litre | 2.2 litres |
| 9 inches | 1.3 litres | 1.8 litre | 2.8 litres |
| 10 inches | 1.6 litres | 2.2 litre | 3.5 litres |
08. How do I calculate the volume of a square cake tin?
To calculate the volume of a square or rectangular cake tin, you simply multiply the three dimensions together: length, width and height. (It is worth subtracting 0.25 inches from the height, in order to allow for the thickness of the sides and bottom.) The answer then needs to be multiplied by 0.016387064 to convert the amount from cubic inches to cubic litres:
(Length x Width x (Height-0.25)) x 0.016387064
| Width (square tin) |
1.5 inches deep |
2 inches deep |
3 inches deep |
|---|---|---|---|
| 5 inches | 0.5 litres | 0.7 litres | 1.1 litres |
| 6 inches | 0.8 litres | 1 litre | 1.6 litres |
| 7 inches | 1.1 litres | 1.4 litre | 2.1 litres |
| 8 inches | 1.4 litres | 1.9 litre | 2.8 litres |
| 9 inches | 1.8 litres | 2.4 litre | 3.6 litres |
| 10 inches | 2.2 litres | 3 litre | 4.4 litres |
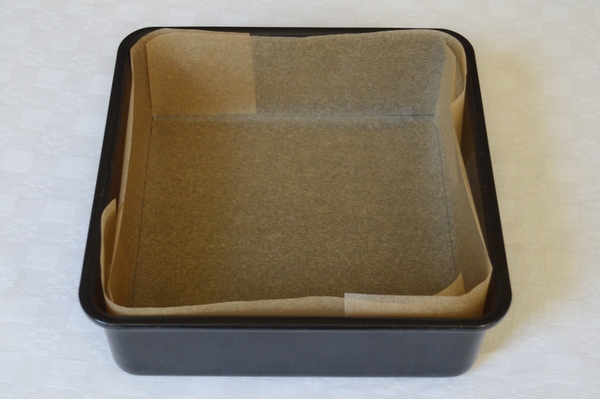
09. How do I line cake tins?
Cake tins are usually greased with a fat like oil or butter to stop the cake from sticking to the cake tin during cooking. Liquid fats are lightly brushed around the sides and bottom using a pastry bush, while solid fats are smeared on with a piece of kitchen paper (or a couple of fingers). But grease can ‘fry’ the sides of the cake, creating a tough, dark crust that may need to be sliced off. For this reason, greasing is not recommended for dense cakes with long cooking times like fruit cakes, or for high-sugar cakes that will caramelise at the edges. Slippery, greased sides can stop delicate foam-based batters from climbing up the sides and rising. If the recipe involves whisking egg whites to soft peaks before incorporating into the batter, then the cake tin should not be greased. Instead, the cake tin should be lined with a collar that stands 2 inches proud of the top of the cake tin.
Lining a cake tin with non-stick baking paper prevents over-browning by insulating the edges of the cake from the heat of the metal. It also makes the cake easier to release from the cake tin, as the whole thing can simply be lifted out. This is useful for cakes that are particularly fragile when warm, such as gluten-free cakes like Tarta de Santiago, and molten cakes with gooey centres like chocolate brownies. In contrast to grease-proof paper, baking paper / parchment is non-stick. This means that it it is not necessary to grease a cake tin after it has been lined. Some people grease the cake tin before inserting the lining, in order to ‘glue’ the baking paper to the sides. This is also unnecessary, as the weight of batter will pin the lining snugly to the sides of the cake tin when it is poured in.
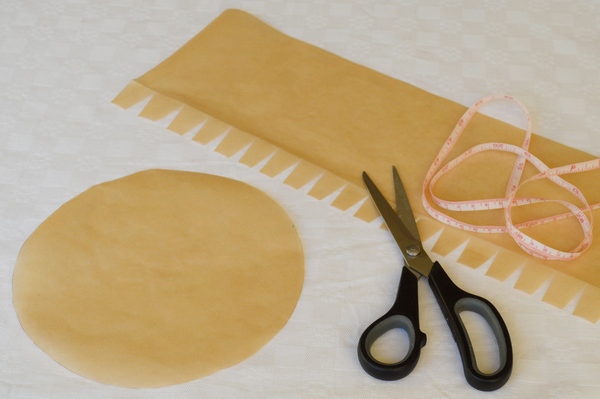
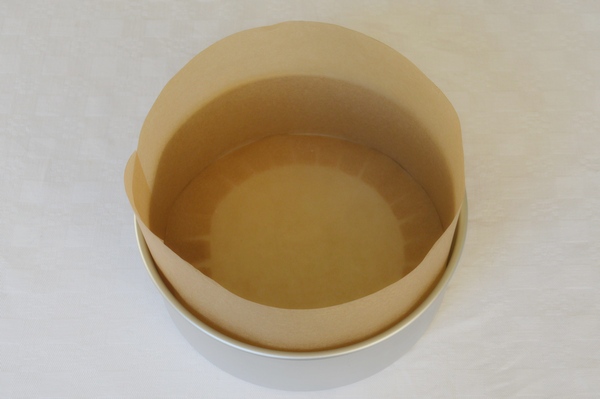
- Place the cake tin on a sheet of baking paper. Draw around the base and then cut out. This disc will be used to line the bottom of the cake tin.
- Wrap a roll of baking paper around the outside of the cake tin with a slight overlap, and then cut from the roll (for a cake tin that is 8 inches wide, this strip will be about 27 inches long).
- Measure the height of the cake tin, add 3 inches, and then cut the strip of baking paper down to size.
- Fold a 1 inch cuff at the bottom, and then snip out v-shaped notches at regular intervals.
- Press the strip around the inside of the cake tin, with the folded cuff sitting flat on the base. Fit the disc on top of the snipped edges, so that it covers the base of the cake tin.
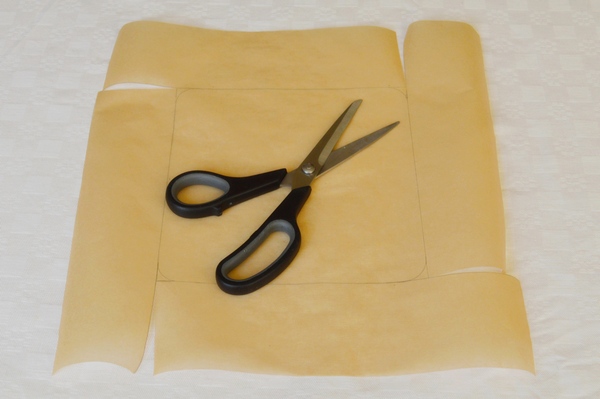
- Place the cake tin face down on a work surface. Wrap a roll of baking paper up one side, across the base and down the other side. Cut from the roll (for a cake tin that is 8 inches wide and 3 inches high, this strip will be about 14 inches long).
- To create a neat square, fold the strip of baking paper in half diagonally to create a triangle, and trim any excess. Open out.
- Centre the cake tin on the square of baking paper and draw around the base. Remove the cake tin.
- Cut four slits from the edge of the baking paper to each corner.
- Press the baking paper into the cake tin, making a crease where the sides meets the base and overlapping the corners.
(to line a rectangular cake tin, first measure the length, width and height of the cake tin. Cut a strip of baking paper that is as long as the length of the cake plus 2x the height, and as wide as the width of the cake tin plus 2x the height. Then pick up the instructions for lining a square cake tin at point 3).
10. What is the best material for cake tins?
Bakeware is available in a variety of materials. For simplicity, these can be categorised into metal or non-metal. Non-metal materials include glass and stoneware. These take longer to heat up, but keep hold of heat for longer. Thin metal cake tins are quick to heat up, but lose heat quickly. This is what is meant by ‘conductivity’ – the rate at which heat moves through a material. Metal is described as a good conductor, because it transfers heat quickly to food and hastens cooking. Dark, dull metal conducts heat quicker than light, shiny metal. Heavy cast iron is particularly conductive, which promotes the formation of a brown crust on the sides and bottom.
Clearly size isn’t the only consideration when choosing the right cake tin. The weight and colour of the cake tin also determines how quickly and evenly the cake is cooked. The best results can be achieved using a light-coloured metal such as anodised aluminium. This transfers heat quickly, but without over-cooking the sides or bottom. Dark metal cake tins can be used when a tougher dark crust is desirable, such as on muffins and quickbreads.
- thin and lightweight
- must be greased or lined
- quick to heat
- reflects heat
- can be scoured clean
- cupcakes
- sponge cakes
- high-sugar bakes
Good for light and delicate cakes, where a pale crust is important.
Cake batters that contain a high ratio of sugar fare better in light-coloured cake tins. This is because sugar undergoes a chemical reaction when heated, which causes it to darken (caramelisation).
- thin and lightweight
- non-stick coating
- quick to heat
- absorbs heat
- scourers and metal utensils will scratch
- biscuits
- cookies
- muffins
- quickbreads
Produces similar results to anodised aluminium, but allows a flavoursome brown crust to develop.
- thick and heavy
- non-stick (if well-seasoned)
- slow to heat
- hottest metal
- retains heat
- high maintenance to clean (need to avoid rusting)
- cornbread
- crusty bread
- upside-down cakes
Good for creating crisp crusts and for caramelising sugar. This is because cast iron gets hotter than steel and aluminium.
Cast iron bakeware is usually pre-heated to get it up to temperature before use.
- thick and heavy
- must be greased or lined
- slow to heat
- hotter than metal
- retains heat
- attractive serving dish
- easy to clean (can be left to soak and then scoured)
- baked custard
- chocolate fondant
- fruit crumble
- pie
- souffle
Good for serving dessert directly from oven to table. Food will stay warm once removed from the oven, and will continue to cook for several minutes in a process called ‘carryover’ cooking. This means that glass / stoneware is better suited to wet bakes that are not in danger of drying out.
As glass takes a while to heat up, it is good for dishes which need long and slow cooking, like egg-based puddings.
Once transparent glass gets up to temperature, it exceeds the temperature of metal. This produces crisp, dark pie crusts.
- thin and flexible
- non-stick
- does not retain heat
- easy to clean (dishwasher safe)
- chocolates
- cupcakes
Good for creating small, intricate shapes that are easy to release from the mould.
Silicone is too floppy for baking larger shapes like cakes and loaves. Large silicone moulds bulge at the sides if they are not placed inside a rigid container.
Silicone does not conduct heat. This means that it does not produce a flavoursome brown crust.
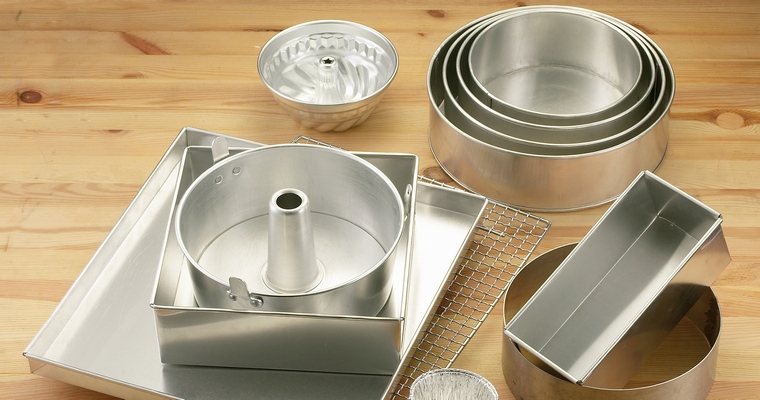
11. Which are the most useful cake tins to buy?
If you can only afford to buy one cake tin, then buy a round cake tin measuring 8 inches wide and 3 inches high. This is pretty much the standard size for sponge cakes. I would aim to build up a set of four cake tins, which I have listed below in order of usefulness:
8″ wide x 3″ high
- anodised silver
- removable bottom
- sponge cakes
- pale crusts
9″ wide x 2″ high
- carbon steel (non-stick coating)
- fixed bottom
- buy two of these cake tins
- layer cakes
- upside-down cakes
- tarts
- dark crusts
8” wide x 2” high
- carbon steel (non-stick coating)
- removable bottom
- buy baking paper for lining
- tray bakes
- brownies
(dimensions vary)
- cast iron
- quickbreads
- crusty bread
12. Which cake tins are best for gluten-free baking?
Gluten-free cakes behave quite differently to cakes made with wheat flour. This is because wheat flour produces a sticky protein called gluten when it is mixed with water. Gluten creates a strong, elastic framework that is very effective at trapping air. If you remove gluten, then you weaken the structure. As a result, gluten-free cakes are naturally denser, crumblier and in danger of falling apart when turned out of the cake tin. They also tend to brown faster, as gluten-free flours are not as absorbent, and dry out faster in the oven. This is particularly the case if ground almonds have been used, as almonds have a high fat content due to their natural oils.
The ideal cake tin for gluten-free baking is one which minimises browning and offers easy release. The first objective can be achieved by using a light-coloured cake tin to deflect the heat, and by lining it with baking paper to insulate the cake. The second objective can be achieved by using a cake tin with a removable bottom. There are two designs to choose from. Loose-bottom cake tins have a detachable bottom than can be pushed up from the base. Springform cake tins have a catch on the side that can be thumbed open to expand the cake tin. It’s up to you which design you prefer, as they produce the same results. I prefer loose-bottomed cake tins, because they take up slightly less space in the cupboard and are more durable. Neither should leak in the oven, as gluten-free batters tend to be thick.


You have done a very useful work. Health to your workers. Thank you.