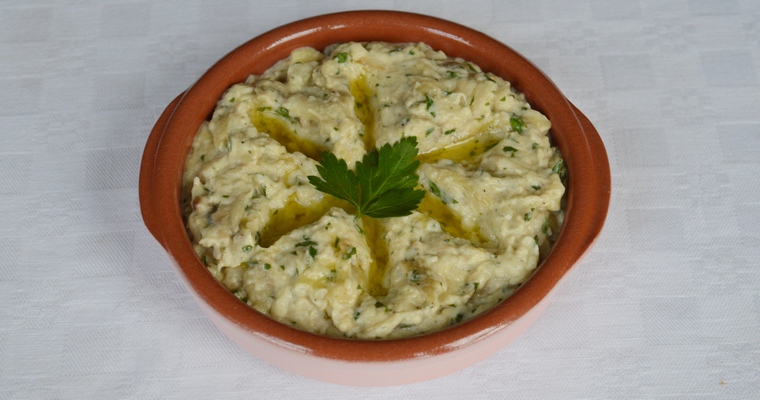
Classic Middle Eastern dip made from pureed chickpeas, tahini, garlic and lemon. Chickpeas are made more digestible by soaking and cooking with aromatics.
Paleo Plus

| Skip straight to the recipe |
01. What is Hummus?
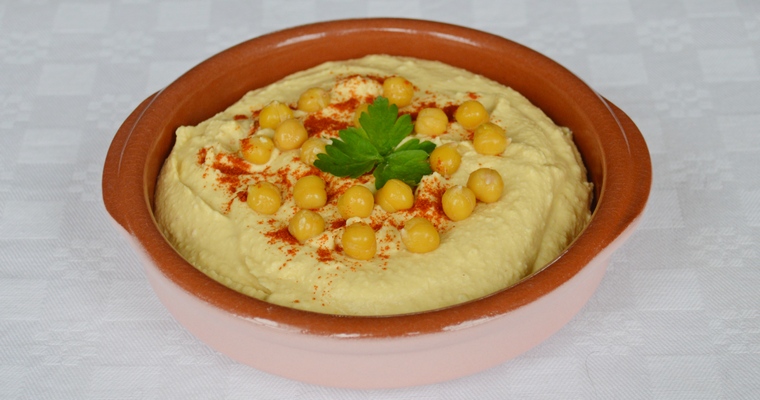
Hummus (or houmous) is a creamy dip made from pureed chickpeas, tahini (sesame paste), garlic and lemon juice. It is usually served as a dip for raw vegetables like sliced carrots, cucumber or bell peppers, or with flat breads like pita. Hummus is also commonly served as a condiment to that other paean to chickpeas, the falafel ball. Because falafel is deep-fried, it has a very dry and crispy crust that benefits from a moist and creamy sauce.
02. Why are chickpeas difficult to digest?
Pulses like chickpeas contain complex carbohydrates that are difficult to break down and digest. Oligosaccharides are carbohydrate chains comprised of three to ten sugars (oligos- meaning a few, and -saccharide meaning sugar). Humans do not have the necessary digestive enzymes to break down oligosaccharides. This means that chickpeas resist digestion in the small intestine, and pass intact to the colon. Once in the large intestine, they are broken down through the process of fermentation, which produces gas (think of fizzy yeast-fermented beer). In a healthy gut, this may result in some minor flatulance, but otherwise serves as a beneficial prebiotic. That is, the ‘resistant’ starch provides food for good bacteria, strengthening the gut wall and reducing inflammation. However, those who suffer from digestive disorders like Irritable Bowel Syndrome (IBS) may not be able to tolerate prebiotics. Instead, excessive gas will be produced, leading to painful bloating, cramping and diarrhoea.
03. Why do you soak pulses before cooking?
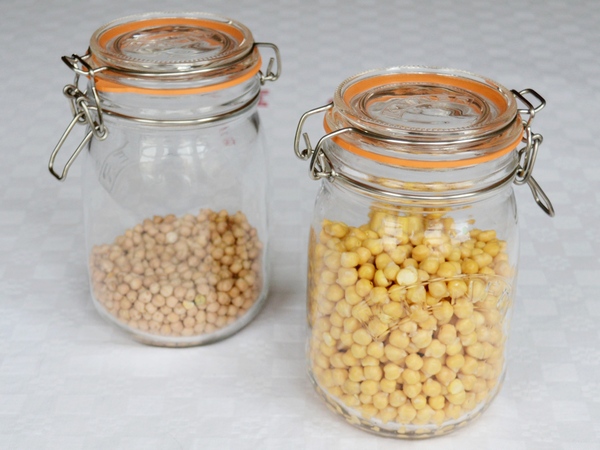
Leaving pulses to soak in water for several hours before cooking serves two purposes. Firstly, it significantly reduces cooking time by saturating and softening dried beans and peas. After rehydration, they will swell up to three times in size (see accompanying photo for a ‘before’ and ‘after’ comparison). Secondly, soaking removes phytic acid and increases digestibility. Phytic acid cannot be digested by humans, and irritates the gut. Pulses are seeds, which means that they are the dormant germ of a new plant. They do not want to be eaten, and so they have developed a clever way of locking up their nutrients to resist digestion. Soaking tricks the nuts into waking up and releasing their nutrients.
04. Can I speed up the cooking time of pulses?
Chickpeas can take a long time to cook, particularly if they are old or if you are cooking them in hard water. I live in a hard water area, and the last time I attempted to cook chickpeas in plain water I had to give up and go to bed after 5 hours! Adding baking soda reduces the cooking time by as much as 75%, as it softens the cell walls. Some people suggest adding baking soda to the cooking liquid, but this can impart an unpleasant soapy taste and slimy texture. It also means that you cannot repurpose the cooking liquid for other cooking projects. So it is better to add baking soda to the soaking liquid.
05. What can I do with the leftover chickpea cooking liquid?
‘Aquafaba’ is the name given to bean cooking liquid. As the beans cook, they release starch into the water, creating a gelatinous liquid. The superior gelling properties of this liquid mean that it is commonly used as an egg replacement in vegan cooking. The general rule of thumb is to replace 1 egg with 3 tablespoons of aquafaba – assuming that the aquafaba has a nice thick consistency, and doesn’t need boiling to reduce.
06. What else can I do to improve the digestibility of chickpeas?
Slightly overcooking the chickpeas is an obvious way to increase digestibility. Some herbs and spices help with the digestion of pulses, so can be added to the cooking liquid. The list of beneficial aromatics includes bay leaves, fennel seeds, cumin and sea vegetables. If, like me, you are slowly recovering digestive health, I would advise using hummus as a bridge to ease yourself back into eating pulses. Being slow-cooked and pureed it is much more manageable than a plate of rice and beans or bean chilli.
07. What’s the difference between tinned chickpeas and dried chickpeas?
Tinned beans have been cooked by someone else. At the cannery, the beans are sorted, soaked and then pressure-cooked in the cans at temperatures between 110°C/230°F – 135 °C/275°F. Beans that are processed at a higher temperature and for a longer time will have a softer texture, while beans that are processed at a lower temperature and for a shorter time will have a firmer texture. Some manufacturers package the chickpeas in only water and salt, but other manufacturers add colour preservers, firming agents and other additives. Unwanted chemicals affect the nutritional value and flavour.
As a consumer of a processed product, you have no control over the texture or flavour. Good tinned chickpeas do exist, but you may need to taste test a few brands. Some taste bland and underseasoned, while others taste metallic or grassy. Choose a brand that lists only chickpeas, water and salt on the ingredients list. Firmer chickpeas are perfect for salads and stews, but you need softer chickpeas to create a smooth hummus that is not gritty. I have given two recipes for hummus: one which uses dried chickpeas, and one which uses tinned chickpeas. The tinned recipe contains a slightly different balance of flavourings, to counteract the blandness. Extra lemon juice is added for brightness, while some olive oil is added for its rich flavour, and because extra liquid is needed to produce a smooth texture. A tin of chickpeas makes roughly half the amount of hummus produced by 200g of soaked-and-then-cooked dried chickpeas. As a general rule of thumb, you can calculate the cooked weight by multiplying the dried weight by 2 1/4 (200 x 2.25 = 450g).
08. Is hummus best made with tinned chickpeas or dried chickpeas?
Homecooked dried chickpeas are easier to digest, have superior flavour and can be cooked to the right texture for your recipe. But they require time and effort. I recommend enjoying the convenience of good quality tinned chickpeas when you intend to cook them in strongly-flavoured dishes like a curry or stew. Bland or funny flavours are not an issue, as they will be masked by spices. But if you are eating chickpeas straight out of the can, in a salad or a puree, then the flavour is more important. For this reason, hummus is best made with dried chickpeas.
Tips & Tricks
- cook covered with a lid – this results in softer chickpeas that break apart. Cook uncovered if you want firmer chickpeas (e.g. for a salad or curry).
- slightly overcook the chickpeas – they will probably be tender enough after 1 hour, but cooking them for a bit longer will result in a creamier texture and make them easier to digest. However, don’t overcook them to the point where they no longer hold their shape.
- leave to cool in the cooking liquid – this infuses more flavour into the chickpeas.
- peel the chickpeas – this yields a creamier texture and a cleaner flavour.
Ingredients
for soaking:
- 200g dried chickpeas
- 1 teaspoon salt
- 1/2 teaspoon baking soda
- 600ml water
for cooking:
- 2 bay leaves
- 800ml water
for blending:
- 2 garlic cloves, peeled and minced
- 6 tablespoons (90ml) lemon juice (about 2 lemons)
- 4 tablespoons (60ml / 70g) tahini
- 1/4 teaspoon ground cumin
to serve:
- pinch of paprika
Instructions
- Soak the chickpeas. Place the chickpeas, baking soda and salt in a bowl, and cover with a generous amount of cold water (the beans will triple in size). Cover with a lid, and leave to soak for 24 hours.
- Cook the chickpeas. Drain through a colander and rinse well under the cold tap. Transfer the drained chickpeas to a saucepan. Add the bay leaves and cover with a couple of inches of cold water.
- Cover with a tight-fitting lid. Heat on high and bring to the boil. This will cause the impurities to rise to the top, creating a layer of foam. Remove the lid and skim off the foam (lower a ladle over the centre of the pan, until the bottom just breaks the surface of the stock. Sweep the ladle around in a circle, gradually increase the circle to push the foam to the sides of the pan. Then scoop up the foam from the sides and discard).
- Reduce the heat to a steady simmer and replace the lid. Cook until the chickpeas begin to bob to the surface, lose their skins, and break down when squeezed between finger and thumb – about 1 hour 15 minutes to 1 hour 30 minutes. Turn off the heat and leave the chickpeas to cool in the cooking liquid.
- Make the hummus. To remove the bite from the raw garlic, place in a small bowl with the lemon juice and leave for 15 minutes. When ready, transfer to the small bowl of a food processor and add the tahini and cumin. Blitz until blended.
- Peel the chickpeas. Drain the chickpeas, reserving the jelly-like cooking liquid for another cooking project. Discard the bay leaves. Transfer the chickpeas to a large bowl and fill with cold water. Rub small handfuls in your palms to loosen the skins. Pick out the skins and discard as they float to the top.
- Reserve a spoonful of the chickpeas for garnishing, then tip the rest into the food processor. Blitz to a smooth and creamy consistency. If the mixture needs loosening up, add some of the reserved cooking liquid, a tablespoon at a time. Taste, and add more tahini or lemon juice if necessary.
- Transfer to a serving dish. Garnish with the reserved chickpeas, and lightly dust with paprika. Serve immediately, or store in an airtight container in the fridge for up to 5 days.
Ingredients
- 1 can tinned chickpeas (400g net weight, 240g drained weight)
- 1 garlic clove, peeled
- 3-4 tablespoons (45-60ml) lemon juice (about 1 1/2 lemons)
- 2 tablespoons (30ml / 35g) tahini
- 1 tablespoon extra virgin olive oil
- 1/4 teaspoon fine sea salt
- pinch of freshly ground black pepper
Instructions
- Drain the chickpeas through a sieve, reserving the jelly-like cooking liquid for another cooking project. Rinse well under the cold tap. For a smoother texture, peel the chickpeas to remove the translucent skins. Grab a handful of chickpeas in one hand. Pick out one chickpea at a time with your other hand, and pinch the fat end between your thumb and index finger to pop out the chickpea into a waiting bowl. This will take about 15 minutes, is worth it, but can be skipped if you are short on time.
- Transfer the chickpeas to the small bowl of a food processor. Add the remaining ingredients (garlic, lemon juice, tahini, olive oil, salt and black pepper). Blitz until smooth and creamy, stopping once or twice to scrape down the sides of the bowl. Taste, and add more lemon juice, tahini, salt or pepper if necessary.
- Transfer to a serving dish. Serve immediately, or store in an airtight container in the fridge for up to 5 days.