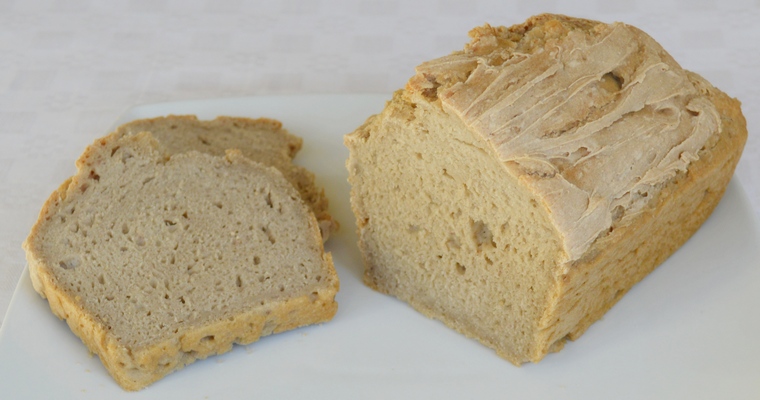
Soft and fluffy Gluten-free bread with a hard, browned crust. Tears apart like normal bread, with a chewy, elastic texture and a subtle wholemeal flavour.
Paleo Plus

Wheat flour is generally used for baking bread because it produces a sticky protein called gluten when it is mixed with water. Gluten creates a strong, elastic framework which is very effective at trapping air. The removal of gluten results in a denser loaf that does not rise as much. Wheat flour can absorb lots of water due to the high absorption capacity of gluten. The loss of these absorbent and sticky protein molecules weakens the structure, resulting in a drier and crumblier loaf. Finally, wheat flour has a neutral flavour. Wholegrain gluten-free flours often have distinctive flavours that can be unpleasantly assertive. (Read my Guide to Replacing Wheat Flour with Gluten-free Flour for more information.)
So these are the challenges that need to be addressed in order to create good gluten-free bread:
- Structure: strong and elastic, not gummy
- Texture: evenly risen with a regular network of air bubbles, not dense
- Hydration: moist, not crumbly
- Flavour: neutral or subtle, not overpowering
Some gluten-free flours help in one area, but may be detrimental to others. For example, tapioca flour helps create elasticity, which results in a nice chewy texture. But too much tapioca flour results in a gummy texture. Potato flour is great at retaining moisture, but has an unpleasant flavour, which is detectable even in small quantities. Each ingredient in my recipe has been carefully considered, and serves a specific purpose. If you do not have the exact ingredients, avoid the temptation to substitute with whatever gluten-free flour you happen to have in your cupboard – this will not produce edible results! I buy my flours online from Shipton Mill, which is an easy and economical way of sourcing the more ‘exotic’ gluten-free flours.
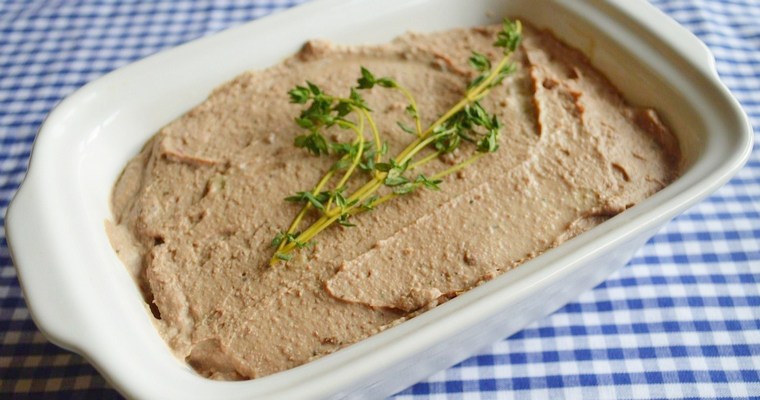
Recipes for using up the leftover egg yolks:


Tips & Tricks
- Activate the yeast before adding to the flour – this shows whether enough yeast in the batch is alive to produce a rise
- Check the temperature of the water – if the water is not hot enough, then the yeast will not be activated. If the water is too hot, then the yeast will be killed
- Thoroughly mix the dough – there is no danger of overmixing the dough, as it does not contain gluten (excessive gluten formation is what makes an over-mixed dough tough)
- Rest the dough – this gives the yeast time to ferment and produce the carbon dioxide bubbles which will raise the loaf
- Cover the dough while resting – this stops the surface from drying out and developing a tough skin which will resist stretching and rising in the oven
- Use a dark metal loaf tin – this helps create a darker, crisper crust
- Place a tray of water in the oven – steam distributes the temperature more evenly, which encourages a more even rise
- Bake on the middle shelf – this is where the temperature is most even
- Increase the temperature halfway through – starting at a lower temperature creates an even rise, as the sides do not set too quickly and force a dome in the middle. The temperature can then be increased to help with crust formation
- Cool in the oven with the door slightly open – this hardens the crust further
- For the best toast, pre-slice while slightly warm – this gives the surface a rougher texture, which browns better than a smoother surface
Ingredients
raising agent:
- 375ml warm water
- 2 1/2 teaspoons fast action dried yeast
dry ingredients:
- 25g chestnut flour
- 75g buckwheat flour
- 100g white teff flour (brown is fine too)
- 125g brown rice flour
- 75g tapioca flour
- 100g arrowroot powder
- 2 teaspoons xanthum gum (replace with 1 tablespoon psyllium husks if you cannot tolerate, although this will affect the rise)
- 1 teaspoon fine sea salt
liquid ingredients:
- 2 large egg whites
- 2 tablespoons (30ml) olive oil, plus a little extra for greasing the tin
Instructions
- Activate the yeast. Measure out the water into a jug. Use a thermometer to check that the temperature is between 38°C/100°F – 41°C/105°F, then adjust as necessary. If you don’t have a thermometer, mix 1 part boiling water (125ml) to 2 parts cold water (250ml). Add the yeast, and leave to stand for 5-10 minutes. After a few minutes you should begin to see little bubbles breaking on the surface, and after about 5 minutes the yeast will suddenly bloom.
- Make the dough. Meanwhile, sieve the flours, arrowroot powder and xanthum gum into a mixing bowl. Add the salt and give the whole lot a stir to blend. Add the egg whites and olive oil.
- Once the yeast has bloomed, pour the contents of the jug into the mixing bowl. If the yeast does not bloom, then you have a dud batch of dead yeast. Throw this away and start again. Use an electric whisk and thoroughly blend the ingredients for 3 minutes on a high-speed setting.
- Rest the dough. Cover the bowl with a tight-fitting pan lid, dinner plate or damp tea towel. Leave to rest in a warm place until doubled in size – about 1 hour. You can leave to develop overnight if you want a stronger, sourer flavour.
- Bake the bread. Preheat the oven to 160°C/320°F. Place a tray of water on the bottom shelf of the oven. Lightly grease a 900g / 2lb dark metal loaf tin with olive oil, and line the bottom with baking paper.
- Scrape the dough into the prepared tin. If necessary, push the dough into the corners of the tin so that it is evenly distributed. If you like, smooth down the top with the back of a wetted spoon, but this will result in a softer crust. Transfer to the middle shelf of the preheated oven. Bake for 20 minutes, then increase the oven temperature to 180°C/355°F. Bake for a further 30 minutes, until a hard, light brown crust has formed on top.
- Cool the loaf. Turn off the oven and remove the tray of water. Leave the bread to cool in the oven for 10 minutes, with the door slightly open. Pop the loaf out of the tin and onto a wire cooling rack. Peel off the baking paper from the bottom, and leave to cool for 1 hour before slicing and eating (if you have the willpower!). Best eaten and sliced while slightly warm. Store in an airtight container at room temperature for up to 5 days.