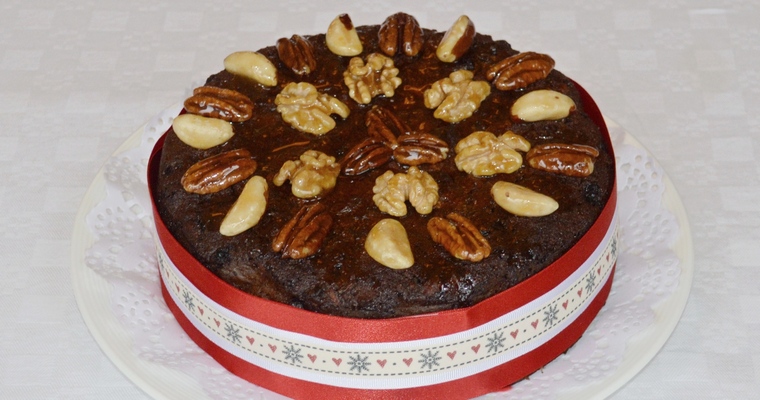
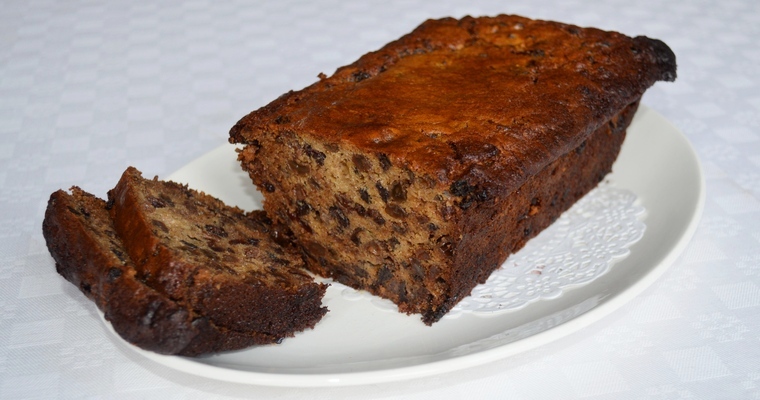
Luxury Christmas fruit cake. Moist, rich and packed with dried fruits, nuts, aromatic spices, citrus and brandy. A Dairy-free, Gluten-free and Paleo recipe.
| Skip straight to the recipe |
01. What is Christmas Cake?
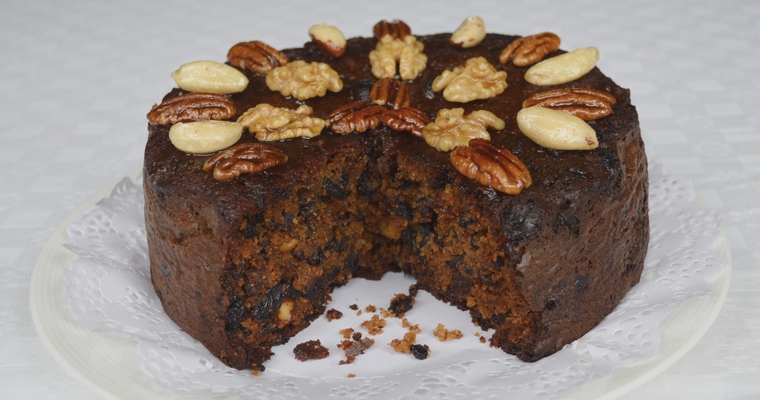
Christmas cake is essentially a rich fruit cake, flavoured with aromatic spices, citrus and fortified wine or spirits. The top and sides may be covered with a layer of marzipan and royal icing, or the top may be decorated with an assortment of glazed nuts. It is traditionally eaten in Britain on Christmas day, and then fed to visitors in the coming days and weeks. Most folk serve it sliced with a cup of tea, but my mother is a Yorkshirewoman, and so we always ate ours with cheese. Preferably Wensleydale, but any of the mild, crumbly cheeses like Cheshire or Lancashire did the trick. Don’t knock it until you’ve tried it.
This highlights an important point about Christmas cakes: they can be divisive. There is no definitive recipe, and opinions vary as to what fruit should be used, the quantity of booze, and – most controversially of all in our family – whether or not the cake should be iced. It’s all just a matter of personal preference, reflecting familial rather than regional traditions. Typically, each family has their own recipe, handed down and tweaked through the generations. Sadly, my husband’s family have hit a cul-de-sac: his grandmother’s cake was predicated on measuring out the ingredients using a particular mug, and disaster struck when the mug got lost during a house move. My mother-in-law says that she could never get the recipe to work after that. Probably the famed mug is sitting unobtrusively in someone else’s kitchen, like a modern-day holy grail. At least my mother’s family recipe is still going strong, written in imperial units of measurement that refer archaically to pounds and ounces.
02. What fruit goes into a Christmas Cake?
Most Christmas cake recipes contain a whopping 450g of dried vine fruits (currants, raisins and sultanas), and then smaller amounts of glace cherries, chopped apricots and candied peel – about 40g – 75g each. But dried cranberries, figs, dates, prunes and even glace pineapple make guest appearances. If you stick to the overall quantities given in my recipe (400g vine fruits, 150g other dried fruits and 75g nuts) then you can adapt it to your own tastes by swapping things in and out. Just be mindful that larger fruits such as figs should be chopped into sultana-sized pieces. Large, coarsely chopped ingredients will cause the cake to fall apart when sliced. I find that kitchen scissors make short work of chopping up sticky dried fruit.
03. Can you make gluten-free Christmas cake using ground almonds?
Many Christmas cake recipes supplement wheat flour with ground almonds. The almonds contribute a sweet and nutty flavour, while the natural nut oils add moisture. If you replace wheat flour completely with ground almonds, then you remove the sticky gluten proteins that are produced when wheat flour is mixed with water. Gluten is strong, elastic, absorbent and neutral-tasting. Christmas cake is well suited to gluten removal, due to the ingredients that it contains: the sticky fruits glue the cake together, the dried fruits retain moisture by absorbing the alcohol, and the aromatic spices mask the flavour of gluten-free flour (see this guide to gluten-free flours for more information). My recipe also replaces sugar with honey, and butter with olive oil. Honey is physically sticky, and better than sugar at retaining moisture. Cakes made with liquid fat are moister, and keep for longer without going stale.
04. Why do Christmas cakes take so long to cook?
Christmas cakes are very dense. They have a high ratio of fruit, and a thick batter that stops the fruit from sinking to the bottom. Ovens cook from the outside in. This means that it takes a long time for the heat to penetrate all the way through to the centre of dense foods. When baking a cake, the goal is to make sure that the edges do not overcook and scorch before the middle has finished cooking and set. (This is why the standard test for doneness is to insert a toothpick into the centre and see if it comes away clean.) For this reason, Christmas cakes are cooked at a lower temperature than light and airy sponge cakes. If you just blasted a Christmas cake at 180°C/355°F, then the top and sides of the cake would be horribly burnt by the time the centre was finally cooked. Low and slow is the way to go. And the lower the temperature, the longer the cooking time.
A word of caution. For those cross-referencing different cookery books, you will find a bewildering degree of variation in the oven temperatures and cooking times that are given. I would be wary of following older recipes religiously, as these were written when ovens were less efficient. Mary Berry and Delia Smith recommend a whopping 4 – 5 hours for their offerings. If you have a relatively modern oven, then 2 – 2 1/2 hours at 140°C/285°F – 150°C/300°F should be sufficient for a round 8″ / 20cm cake.
05. How do I avoid dry Christmas cake?
Christmas cakes are notoriously temperamental. If you undercook them then the centre will be wet and gooey. But if you overcook them then they will be dry and hard, and studded with burnt, acrid-tasting fruit on the outside. Due to the long cooking time, you are in more danger of overcooking Christmas cake than undercooking. The key to preserving the all-important moistness in a fruit cake is to stop the bits that cook first from drying out while the rest of the cake catches up. In practice, this means protecting the sides and top. A combination of some or all of these methods is usually recommended in Christmas cake recipes:
- use a round cake tin – the heat is evenly distributed, whereas the corners in a square cake tin dry out
- use a light-coloured cake tin – these absorb less heat
- line the cake tin with a double layer of baking paper – this insulates the cake
- wrap the outside of the cake tin in baking strips (or a triple layer of brown paper) – this insulates the cake
- tent the top with cake tin foil – this avoids over-browning
- position on a shelf in the lower half of the oven – this is where the heat is gentler
- place a tray on the oven shelf above – this deflects the heat
- place a tray of water on the oven shelf below – this creates steam and distributes the temperature more evenly
06. How do I line a round cake tin for my Christmas cake?
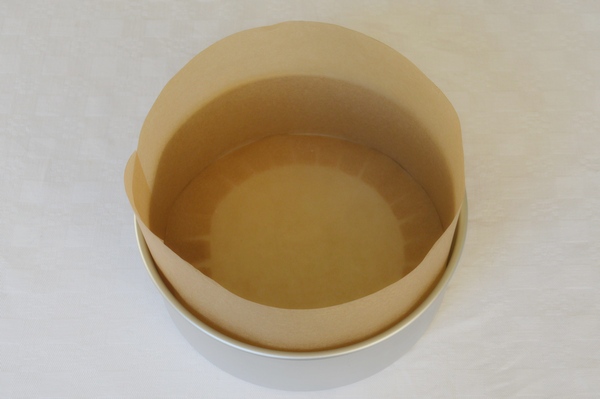
Cake tins are usually greased with a fat like oil or butter to stop the cake from sticking to the cake tin during cooking. But grease can ‘fry’ the edges of cakes that have long cooking times, resulting in a tough, burnt crust that needs to be sliced off. Instead, the sides and bottom of the cake tin should be lined with non-stick baking paper. Because Christmas cakes have particularly long cooking times, the cake tins are normally double- or even triple-lined with baking paper. This insulates the edges from the heat of the metal cake tin, stopping them from drying out and scorching while the centre continues to cook. A strip of baking paper should be fashioned to rise 1-2 inches above the top of the cake tin. This extra ‘collar’ helps the cake to rise by providing traction for the batter to climb up the sides, and also protects the top from over-browning. It is not necessary to apply grease on top of the lining – this is an unnecessary belt-and-braces approach. Nor is it necessary to apply grease to the underside of the lining in order to ‘glue’ it to the cake tin – the weight of batter will push the lining snugly against the sides.
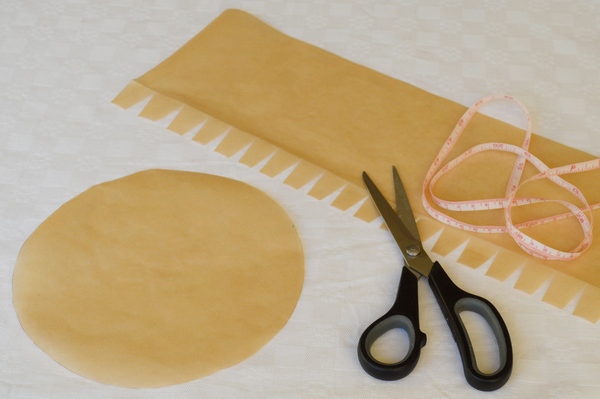
- Place the cake tin on a sheet of baking paper. Draw around the base and then cut out. This disc will be used to line the bottom of the cake tin.
- Wrap a roll of baking paper around the outside of the cake tin with a slight overlap, and then cut from the roll (for a cake tin that is 8 inches wide, this strip will be about 27 inches long).
- Measure the height of the cake tin, add 3 inches, and then cut the strip of baking paper down to size.
- Fold a 1 inch cuff at the bottom, and then snip out v-shaped notches at regular intervals.
- Press the strip around the inside of the cake tin, with the folded cuff sitting flat on the base. Fit the disc on top of the snipped edges, so that it covers the base of the cake tin.
07. How do I know when Christmas cake is cooked?
The rate at which a cake cooks depends on many variables, such as the material of the cake tin, the age of the oven, the brand of ingredients and so on. The recipe writer can provide an indicative cooking time based on how long the cake took to cook within the unique conditions of his or her kitchen, but you will have your own unique set of conditions. All this is a roundabout way of saying that cooking times should only be treated as a guide. They should not be slavishly adhered to at the expense of producing an under- or overcooked cake. The responsibility for assessing whether a cake is cooked is on you, the baker. This is really nothing to worry about. It doesn’t require difficult-to-define Jedi-like powers of intuition, nor does it require decades of experience. All that is needed is basic observation.
You can tell whether a cake is done by assessing the look, feel and sound of the cake. One tell-tale sign that a cake has slipped into the over-cooking stage is when the sides start to pull away from the cake tin. This indicates that the cake has reached an internal temperature that exceeds 100°C/212°F, and the moisture has evaporated. Before this point, you should be able to hear a sizzling sound if you put your ear against the cake. This is the sound of the liquid in the batter bubbling and steaming. If you hear no sound at all, this is a sign that all the liquid has been driven out. Depending on the type of cake, this may indicate that the cake has been overcooked. For example, fruit cakes are not supposed to have a bone dry interior. For moist cakes, the sweet spot is indicated by the presence of a faint and intermittent sizzling sound. You can also check whether there is any liquid left by inserting a skewer into the centre, and then checking it for signs of raw batter.
- look at the sides – they should have just started to pull away from the cake tin
- gently press down on the centre – it should feel firm and springy rather than squishy
- listen to the cake – it should make a faint, intermittent sizzling sound, not a loud, continuous sound
- insert a toothpick in the centre – a few moist crumbs may cling to it, but no wet batter
- insert a thermometer probe in the centre – the internal temperature should be 94°C/205°F
Personally, I swear by using a thermometer probe to check the progress of my cakes. It removes any room for debate. I got one for Christmas 2015, when I found myself roasting a [very expensive] goose for the first time. Of course I referenced the usual stalwarts for cooking times, but was confounded by a total lack of consensus on the matter:
- Hugh Fearnley-Whittingstall – 1 hour 10 minutes – 2 hours
- Nigel Slater – 2 hours 20 minutes
- Good Housekeeping – 3 hours
- Delia Smith – 3 1/2 hours
And so, with no experience of what ‘done’ should look or feel like in a goose, I took the sensible approach of periodically sticking a thermometer probe into the thickest part of the thigh until it reached 75°C/165°F. From memory, I believe this took 1 1/2 hours – although I had actually allowed for 3 hours in my Christmas dinner timings, thanks to some misplaced faith in Delia. (She’s still my favourite cookery writer but, like a good friend who’s always late, one accepts that Delia Time does not move at the same speed as Greenwich Mean Time.)
08. How long does Christmas cake keep for?
Christmas cakes are traditionally made at the end of October or the beginning of November. Christmas cakes actually improve when aged for 2-3 months, as the flavours have time to develop and meld. The sugar, acidic fruit juices and alcohol all act as natural preservatives. An undecorated cake will keep for at least a year if it is regularly topped up with alcohol. This is referred to as ‘feeding’ the cake, and involves poking holes all over the top using a knitting needle, and then brushing over 2 tablespoons of brandy every 2-3 weeks. At all other times the cake should be snugly wrapped in baking paper overwrapped with tin foil, and stored in a cake tin in a cool, dry place. The back of a cupboard is an ideal place, but make sure that it is not next to the oven or a radiator.
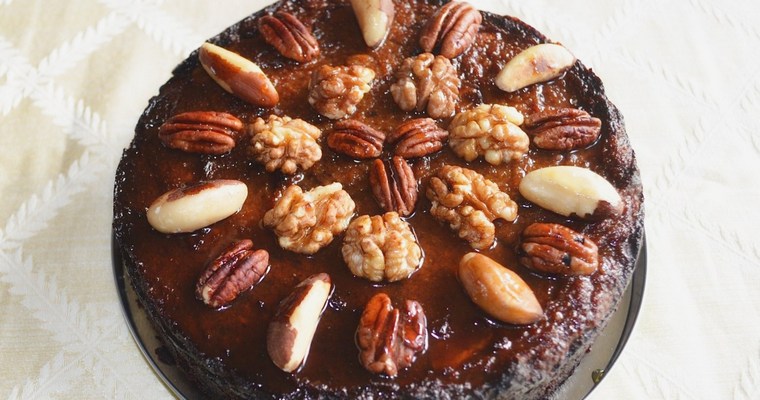
09. When should I decorate Christmas cake?
It is best to save icing the cake until 2 weeks before Christmas. This is because moisture will be pulled out from the icing over time, which will cause it to dry out and harden. The same timescale applies if you are decorating the top with glazed nuts. The sugar glaze should preserve the nuts, but there may be gaps in the glaze which will cause the nuts to go stale and soft. In any case, it is easier to feed the cake if it is not decorated. If the cake has a topping, then you will have to flip if upside down and poke holes in the bottom when you want to brush over more alcohol.
10. How do I scale up quantities to make a larger Christmas cake?
If you want to make a larger or smaller Christmas, then you need to increase / decrease the ingredients by 25% each time you go up or down a cake tin size. Similarly, if you want to bake a square Christmas cake, you need to increase the ingredients by 25% to account for the extra corners. That is, the recipe for an 8″ round cake tin will work in a 7″ square cake tin.
| Ingredients | 7 inch / 18cm round cake tin | 8 inch / 20cm round cake tin | 9 inch / 23cm round cake tin |
|---|---|---|---|
| Sultanas | 160g | 200g | 250g |
| Currants | 160g | 200g | 2500g |
| Dried Apricots | 60g | 75g | 100g |
| Dried Cherries | 60g | 75g | 100g |
| Lemon Zest | 1 small lemon | 1 medium lemon | 1 large lemon |
| Orange Zest | 1 small orange | 1 medium orange | 1 large orange |
| Brandy | 100ml | 120ml | 150ml |
| Orange Juice | 50ml | 60ml | 75ml |
| Ground Almonds | 160g | 200g | 250g |
| Baking Soda | 3/4 teaspoon | 1 teaspoon | 1 1/4 teaspoon |
| Mixed Spice | 3/4 teaspoon | 1 teaspoon | 1 1/4 teaspoon |
| Ground Cinnamon | 1/2 teaspoon | 1/2 teaspoon | 3/4 teaspoon |
| Ground Nutmeg | 1/4 teaspoon | 1/4 teaspoon | 1/2 teaspoon |
| Salt | 1/4 teaspoon | 1/4 teaspoon | 1/2 teaspoon |
| Eggs | 4 medium eggs | 4 large eggs | 5 large eggs |
| Honey | 100g | 125g | 160g |
| Olive Oil | 100ml | 120ml | 150ml |
| Cooking Time | 1 hour 15 minutes – 1 hour 45 minutes | 1 hour 45 mins – 2 hours 15 mins | 2 hour 15 mins – 2 hours 45 mins |
Tips & Tricks
- Use unwaxed oranges and lemons – you will be eating the skin. If using waxed ones, pour over boiling water to melt the wax, then scrub off under a cold running tap using a vegetable brush.
- Soak the dried fruit for 24 hours – this allows the fruit to rehydrate and become plump and juicy.
- Leave to cool in the tin – this traps in moisture.
Ingredients
macerated fruit:
- 200g sultanas
- 200g currants
- 75g dried apricots, chopped into sultana-sized pieces (use kitchen scissors)
- 75g dried cherries
- grated zest of 1 lemon, unwaxed and organic
- grated zest of 1 orange, unwaxed and organic
- 120ml brandy (or sherry)
- 60ml orange juice (about 1 small orange)
dry ingredients:
- 200g ground almonds
- 1 teaspoon baking soda
- 1 teaspoon mixed spice
- 1/2 teaspoon ground cinnamon
- 1/4 teaspoon ground nutmeg
- 1/4 teaspoon salt
wet ingredients:
- 4 large eggs, separated
- 125g honey
- 120ml olive oil
chopped nuts:
- 75g whole almonds, chopped
to make the glazed nut topping:
- 2 tablespoons brandy (or sherry) + 1 tablespoon more
- 2 tablespoons honey
- 11 whole pecans
- 8 whole brazil nuts
- 6 walnut halves
Instructions
- Macerate the fruit. Combine the sultanas, currants, apricots, cherries, lemon zest, orange zest and brandy in a mixing bowl. Give the mixture a good stir with a large metal spoon. If you have time, cover and leave to soak for 24 hours, stirring occasionally to turn over the fruit.
- Prepare the cake tin. Use a light-coloured round cake tin that measures 8″/20cm round and 3″/7.5cm deep. Line the sides with a triple-layer of baking paper that rises 2 inches above the top of the cake tin. Line the bottom with a single layer of baking paper.
- Preheat the oven to 150°C/300°F.
- Mix the ingredients. In a small mixing bowl, measure out the dry ingredients and stir until blended (ground almonds, baking soda, mixed spice, cinnamon, nutmeg and salt).
- In the largest mixing bowl you own, measure out the wet ingredients except for the egg whites (honey, olive oil and egg yolks).
- Put the egg whites in a clean, dry bowl and whisk with an electric whisk for 2 minutes, until soft peaks form.
- Thoroughly mix the wet ingredients using the same whisk, until the honey and oil emulsifies into a thick yellow liquid. Add the dry ingredients, and stir until blended.
- Fold in the egg whites. Lighten the mixture by stirring in half of the whisked egg whites. Tip in the rest of the egg whites and gently fold in using a spatula: cut down the centre with the side edge of the spatula; scrape across the bottom of the bowl and up the side, scooping up the mixture as you go so that it is turned over and under; rotate the bowl 90° and repeat until fully blended. Be careful not to overwork the mixture and knock out the air, but make sure the bitter egg white is fully blended.
- Fold in the macerated fruit and chopped nuts to create a very thick batter.
- Bake the cake. Pour the mixture into the prepared cake tin. Smooth the top with the back of a wetted metal spoon. Transfer to the lowest shelf of the preheated oven and bake until the centre is cooked (mine took 1 hour 55 minutes). Rest a sheet of tin foil on top after 1 hour, to avoid over-browning. Bake for another 45 minutes before testing for doneness. When done, the centre should feel springy to the touch and the cake will have started to pull away from the sides of the tin. A toothpick may not come away completely clean when inserted into the centre, but should show a few moist crumbs rather than wet batter. The truly accurate test is to insert a thermometer probe into the center – the internal temperature should be 94°C/205°F. If the cake needs longer, return to the oven and test again every 10 minutes
- Allow to cool completely in the cake tin. To store, remove the lining paper from the sides and bottom. Wrap in a new sheet of baking paper, and then wrap the whole lot tightly in tin foil. Transfer to a cake tin and store in a cool, dry place.
- Mature the cake (optional). If making 4 weeks or more in advance, ‘feed’ the cake with alcohol every 2-3 weeks, until you decorate the top. Pierce the top all over with a knitting needle. Brush over 2 tablespoons of brandy at a time using a pastry brush. Wait for it to soak in before wrapping up the cake again.
- Decorate the top. Ideally, the topping should be applied no more than 2 weeks before serving (to keep the nuts fresh). Put the honey and 2 tablespoons of brandy in a small saucepan. Heat over a medium heat and stir with a metal spoon until the honey dissolves into the brandy – about 1 minute. Turn up the heat to medium-high and boil until the liquid thickens and leaves behind track marks when a spoon is dragged along the bottom of the pan – about 2-3 minutes.
- Tip the nuts into the pan and turn over with the spoon until fully coated in caramel. Do not touch the caramel as it will be very hot and stick to your fingers like napalm. Use a couple of teaspoons to lift out the nuts, one at a time, and place on top of the cake in an attractive pattern. Once all the nuts have been glued to the cake, loosen any leftover caramel by adding a tablespoon of brandy to the pan and briefly heating over a low heat. Scrape the bottom continuously with a metal spoon, and turn off the heat as soon as the hardened caramel has dissolved into the brandy. Use a pastry brush to dab on top of the cake, in the gaps between the nuts.


Like the look of this going to give it a go
will post result
Dear Pamela. Temperature of the GF cake looks to be crucial.
Please please, is this a fan oven temperature?
Thanks, Bob
Hi Bob, no, the cooking temperature given is for a regular oven. If you have a fan-assisted oven, the general rule of thumb is to reduce the temperature in a recipe by 20°C/50°F . Hope this helps, Ruth.